Getting REX (formerly PMEX Remix) Set Up on Steam Deck
Project M EX Remix, or PMEX Remix for short, is an extension of Project+ that adds a ton of new characters, stages, and rulesets. The project has recently been renamed to REX, and the team continues to expand their ambitious vision of this massive mod. Getting it set up on Deck is very similar to Project+.
Requirements
As with the case of Project+, you’ll obviously need a dumped ISO of your Brawl disc, along with a USB-C dock with at least two USB ports for your GameCube controller adapter and an Ethernet port if you’re planning on using netplay.
1. Get PMEX Remix
Head over to Google Drive and download the .rar file for the Dolphin build of PMEX Remix. Extract the archive to your desktop. This will probably take a few minutes, as the archive is quite a large file size.
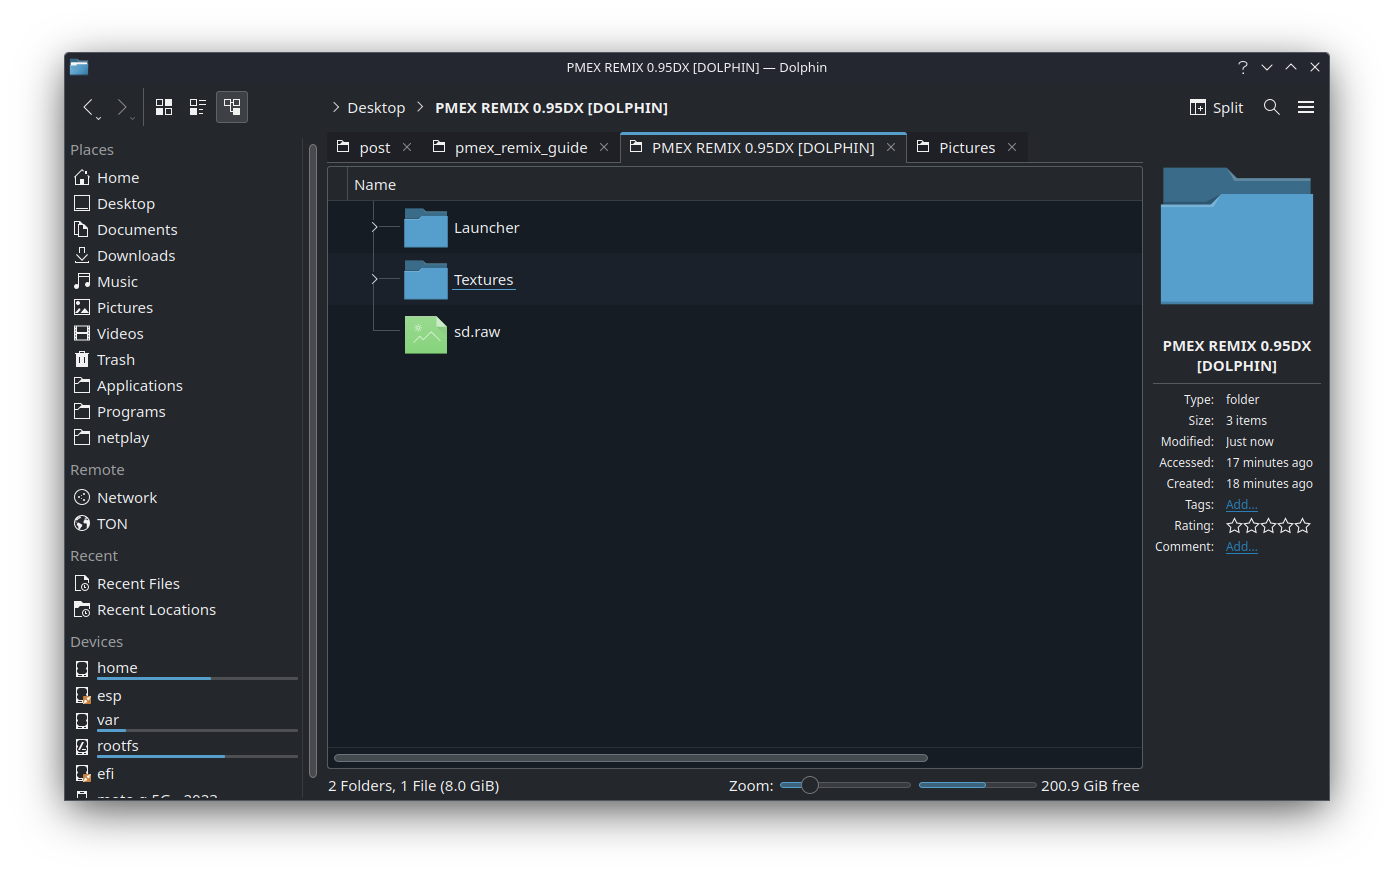
The folder contains a lot of junk that we don’t need. All we need from the folder is as follows:
- the
sd.rawfile in/User/Wii/ - the launcher .elf files found in
/Launcher/ - the custom texture files found in
/User/Load/Textures/RSBE01/
If you want to make your folder look a little more clean, I’d suggest deleting everything else from the folder, and moving all the necessary files to the root folder. In the end your PMEX Remix folder might look something like this:
Please make sure the sd.raw file is 8 GB. Simply hover the mouse cursor over the file and your file manager should tell you the file size. Or you can right-click it and go to Properties.
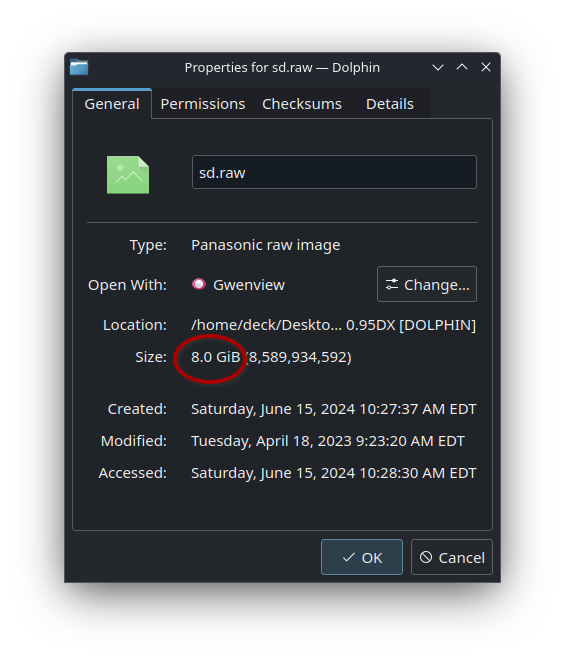
Some users have encountered issues with the sd.raw file being a different size. If this is the case for you, re-download PMEX Remix. Otherwise, you’ll just end up booting vanilla Brawl with Dolphin.
2. Get Faster Project+
The latest version of PMEX Remix at the time of writing this is version 0.95DX, which uses Faster Project+ 2.3.2 as the base. Note that while you can use the latest version of Faster Project+, it is recommended to stick with version 2.3.2 to prevent desyncs with other players if you’re using netplay. Simply download the AppImage for version 2.3.2. Move the AppImage to your PMEX Remix folder.
Next, right-click the AppImage and ensure it’s marked as executable in the Permissions tab in the file’s Properties menu.

3. Configure PMEX Remix
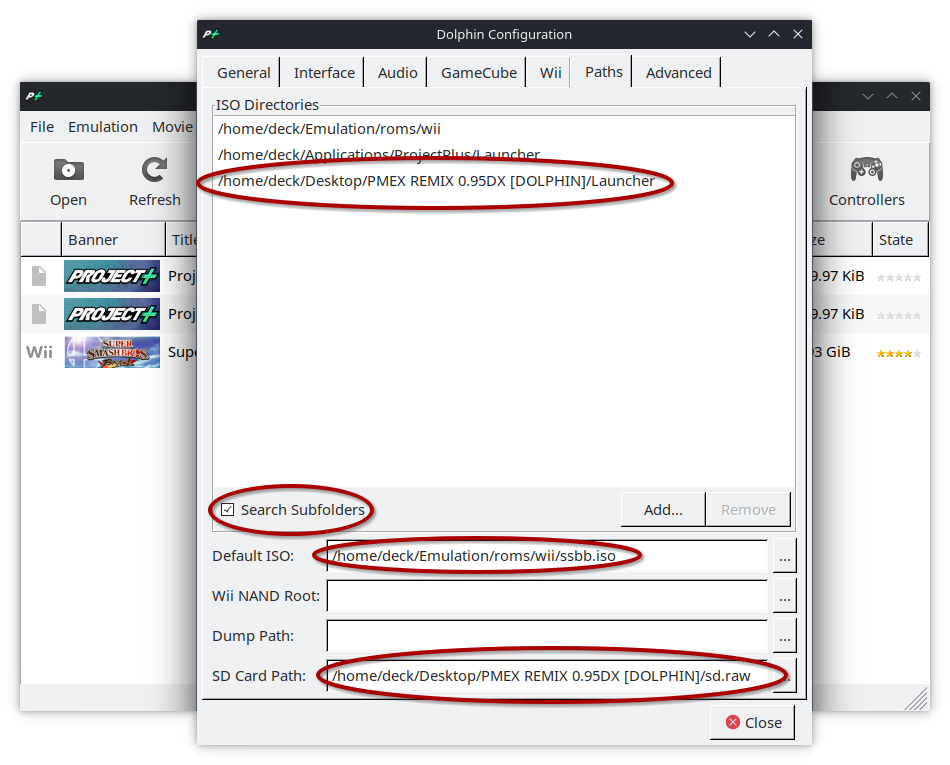
Launch the Faster Project+ AppImage. Go to the “Paths” tab in Dolphin’s configuration settings. Note that if you have previously set up Project+, you’ll likely have a few paths configured here already. Add an ISO directory and point it to (your PMEX Remix folder)/Launcher/. Ensure “Search Subfolders” is checked so Dolphin can pick up both the offline and netplay launchers. Set the default ISO to your Brawl ISO, and the SD card path to (your PMEX Remix folder)/sd.raw.
From here, you can follow my Project+ guide for setting up your graphics and controls, as they are largely similar. So they would be as follows:
- Vulkan backend
- 16:10 aspect ratio on Deck, 16:9 if docked
- use fullscreen
- 2x internal resolution on Deck, higher if docked
- (optional) widescreen hack enabled
- port 1 set to Standard Controller, port 2 to GameCube Adapter for Wii U
Custom Textures
PMEX Remix comes with custom textures. Note that I don’t recommend using these, as it can cause the game to lag. But if you’re only playing offline and don’t mind the occasional hitches, here’s what you can do.
Inside the Textures folder in the PMEX Remix folder, is another folder called RSBE01. Simply copy this folder into ~/.local/share/FasterPPlus/Load/Textures/. Next, in Dolphin, check “Load Custom Textures” from the Advanced tab in the Graphics configuration window. Do NOT check “Prefetch Custom Textures” as it will simply cause the game to crash as soon as it’s loaded.
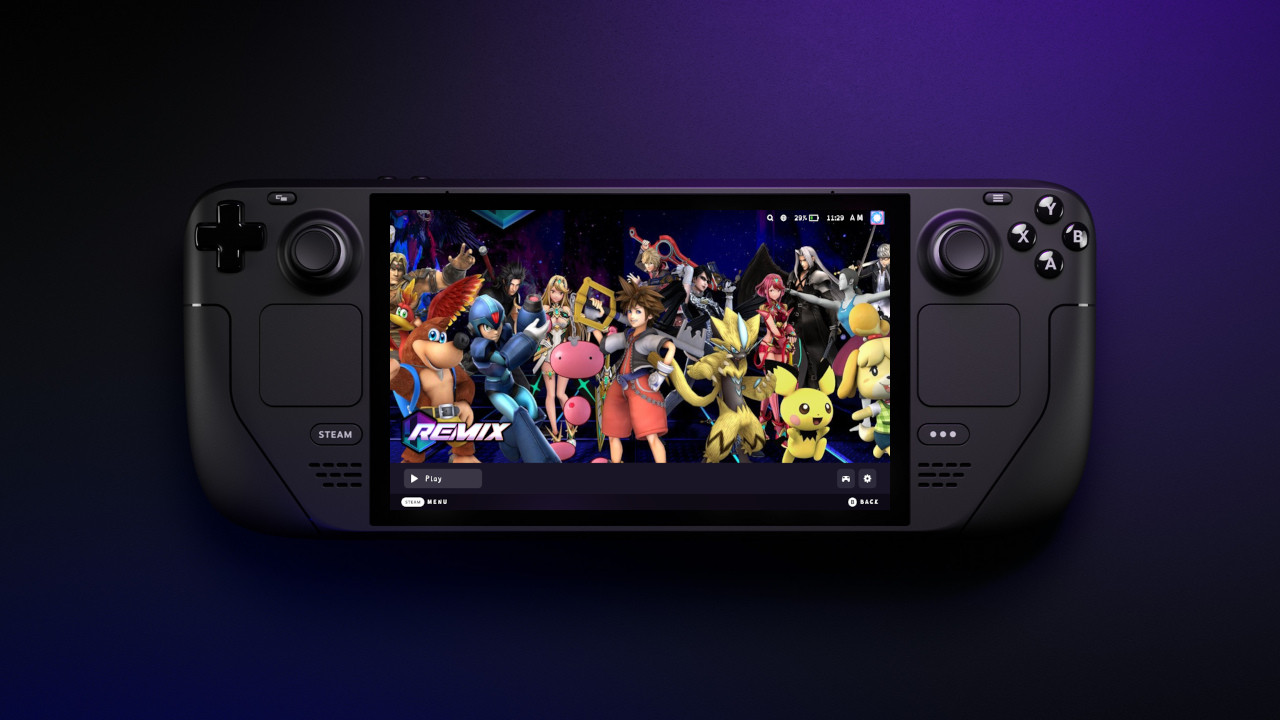
4. Enjoy
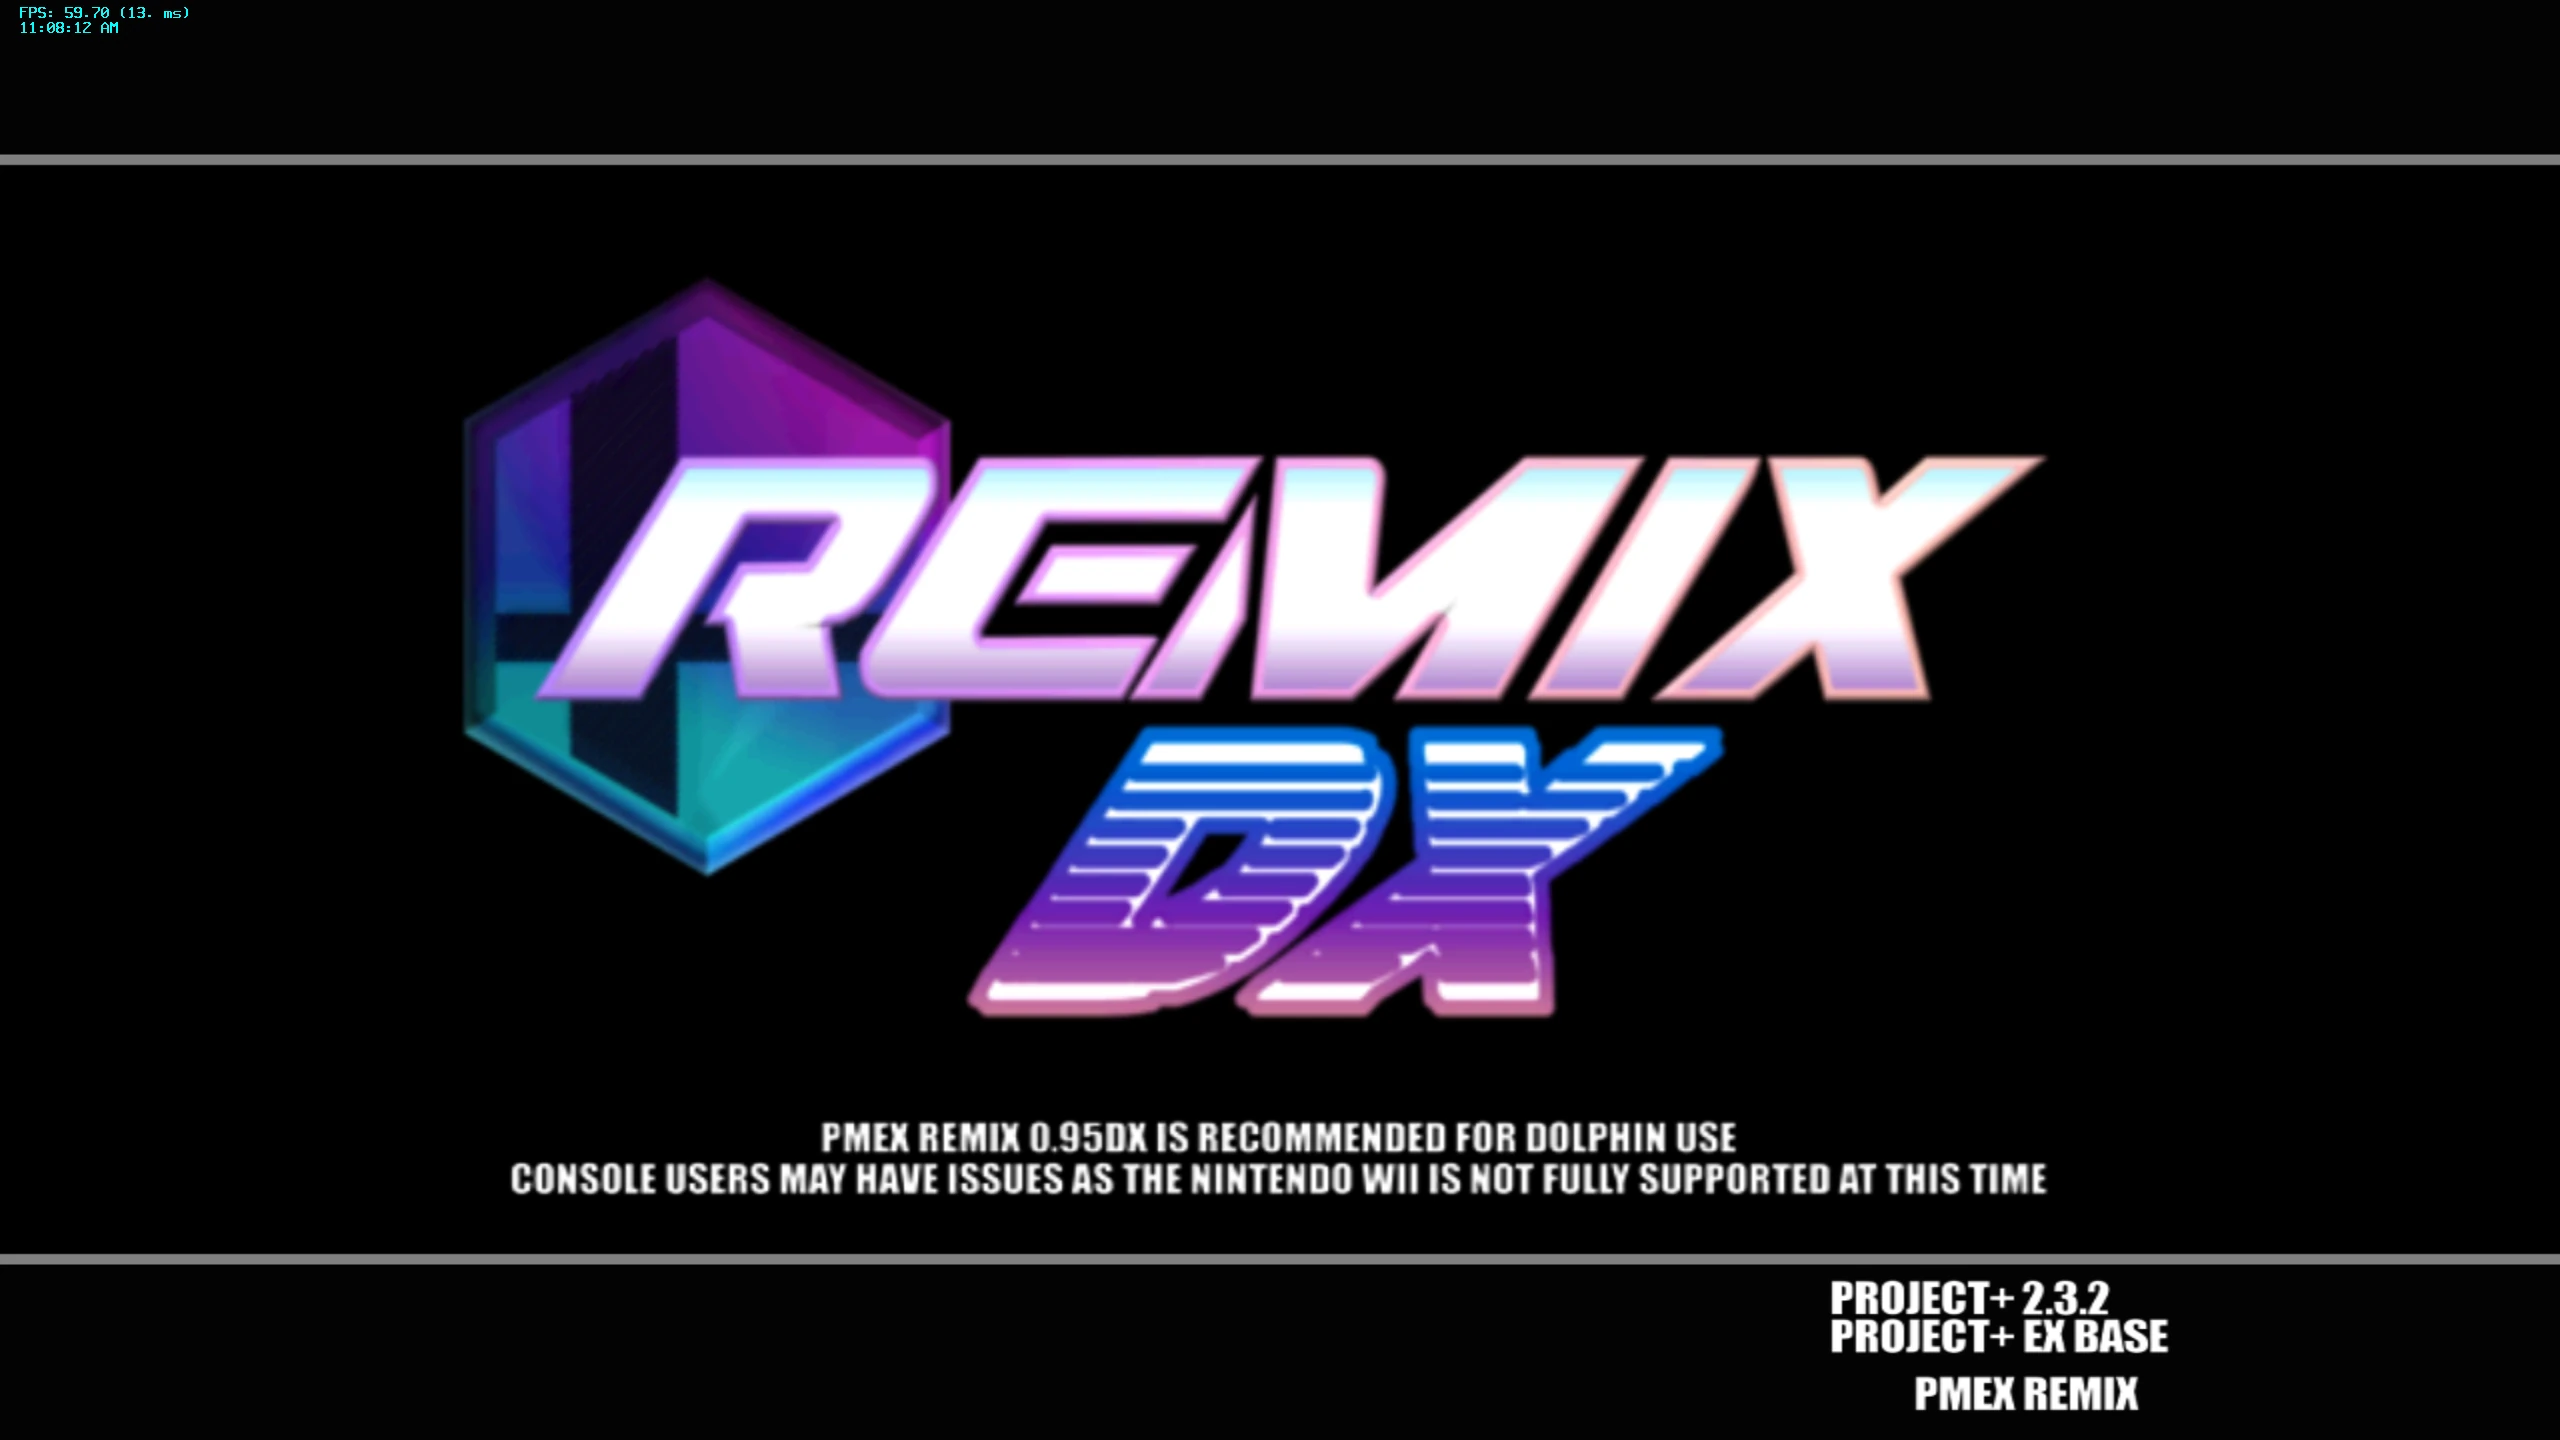
Launch Project_Offline_Launcher.elf from Dolphin. If everything went well you should be presented with a custom splashscreen:
To switch between Project+ and PMEX Remix, simply set the SD card path to the sd.raw file appropriate to the version you’re using, then launch the appropriate launcher from Dolphin.
Tips and Tricks
Boot PMEX Remix Directly from Steam
Right-click the Faster Project+ AppImage from your PMEX Remix folder and add it to Steam. From Steam, go to the AppImage’s Properties menu. Rename the shortcut to “PMEX Remix”. Set the Launch Options as follows:
Launcher/P+EX\ REMIX\ OFFLINE/Project_Offline_Launcher.elf
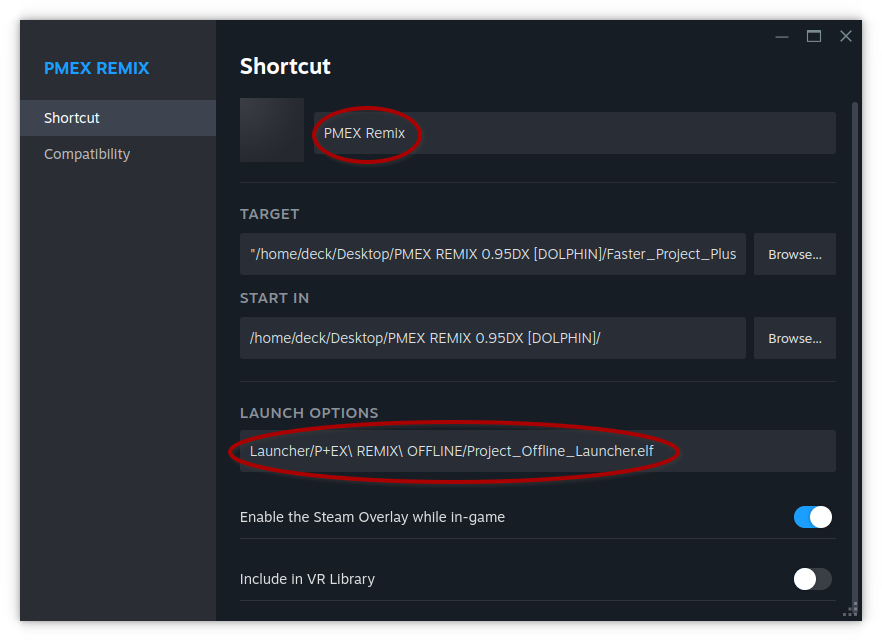
From here, you can add custom artwork with the SteamGridDB plugin.
Overclock the GCC Adapter
If you’re using a GameCube controller, I highly recommend overclocking the adapter for a more responsive input to your controls.
Netplay
Netplay setup is almost exactly the same as I explained in the Project+ guide. Head over to the PMEX Remix Discord and go to the Matchmaking channel section to find someone to play with. Make sure you host with the Dolphin_Remix_Netplay_Launcher.elf file.
Need Help?
Join my Discord and I’ll see if I can help you out.
