Getting Project+ (Project M Spiritual Successor) on Steam Deck
Super Smash Bros. Brawl was regarded as being a major step down from its’ predecessor, Melee, as far as fighting mechanics were concerned. Many of the competitive mechanics were either stripped down or ripped out entirely, including wavedashing and L-canceling. And, for some reason, Sakurai thought it’d be a good idea to introduce random tripping.
Thankfully, some very talented modders emerged from the community not too long after Brawl’s release in 2008. They’ve been able to work with the game’s engine and make it a more fast-paced, competitive platform fighter that would make it more akin to its’ older cousin. Tripping was removed, L-canceling was added back in, wavedashing, you name it. Characters who you played with in Melee will feel a lot more familiar, and some of them even got some buffs that they never had before. Collectively, this project became known as Project M, a name that you’re likely familiar with due to how popular the mod became.
Sadly, in 2015, the team behind the mod suddenly disbanded, for reasons that are unclear, and as a result, no further updates were issued to the mod beyond version 3.6. Fortunately, not all hope was lost. In 2020, Project+ emerged, which, as the official website describes, “is a community driven patch for Project M”. It’s a mod that still gets updates to this day, and continues to pick up where Project M left off, including the introduction of Knuckles as a playable character, further character balances, and so much more.
The great thing about Project+? It runs natively on Linux/Steam Deck. Now you can play this fantastic mod with you on the go. So let’s get started on setting this up!
Requirements
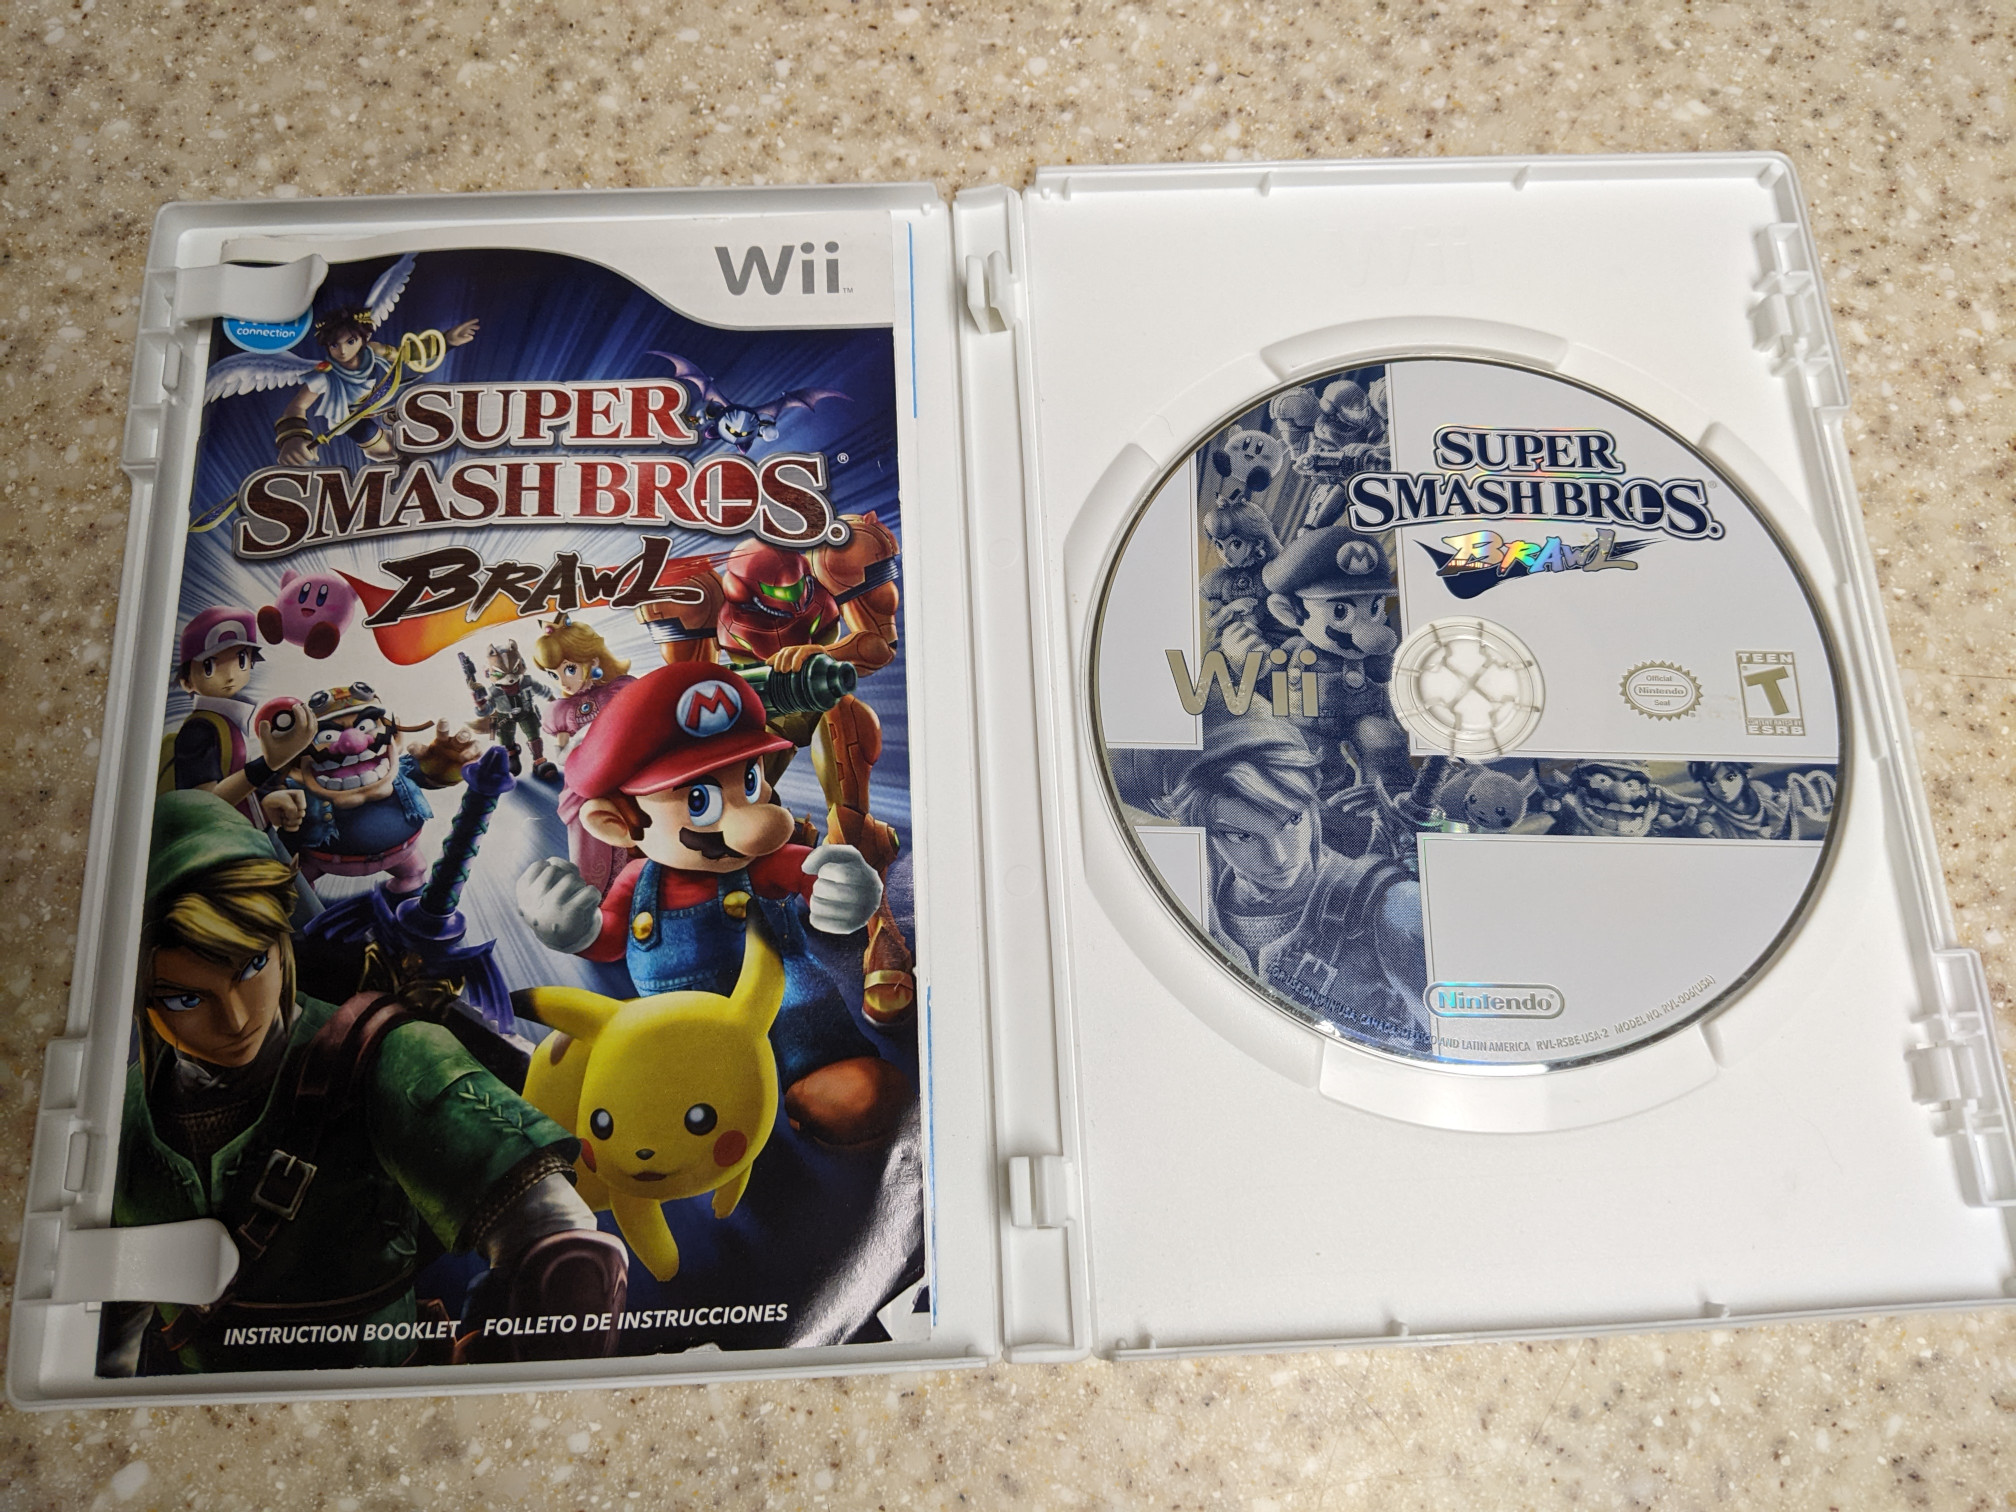
Similar to Slippi, you’ll need a backed-up copy of your Brawl disc. A great way to dump your disc is by using CleanRip with a soft-modded Wii. A USB-C dock is recommended for connecting your GameCube controller adapter if you have one, as well as connecting to an opponent via netplay with an Ethernet connection if you want to play online.
1. Get Project+
With a script that I wrote, I’ve made downloading and updating Project+ a breeze. Head to Desktop Mode on your Deck, and open up a web browser to my GitHub repo. Under “How to Use”, in step 3, there’s a download link to my script. Right-click that link, click “Save link as…” in the context menu, and save the file to your desktop. Double-click the .desktop file to run it, and select “Continue” in the pop-up window.

Select Project+ from the menu and click “OK”. In the sub-menu that follows, select Download and click OK. The script will download the latest release of Project+, including the launcher files and the sd.raw file, and automatically extract them. When the download and extraction is complete, a message will appear indicating that it’s done. Note that this function also updates Project+ if you have a previous version already downloaded.
2. Configure Project+
Click “OK” in the message box to close it, then select “Configure” from the Project+ menu. This will open up Dolphin.

Paths
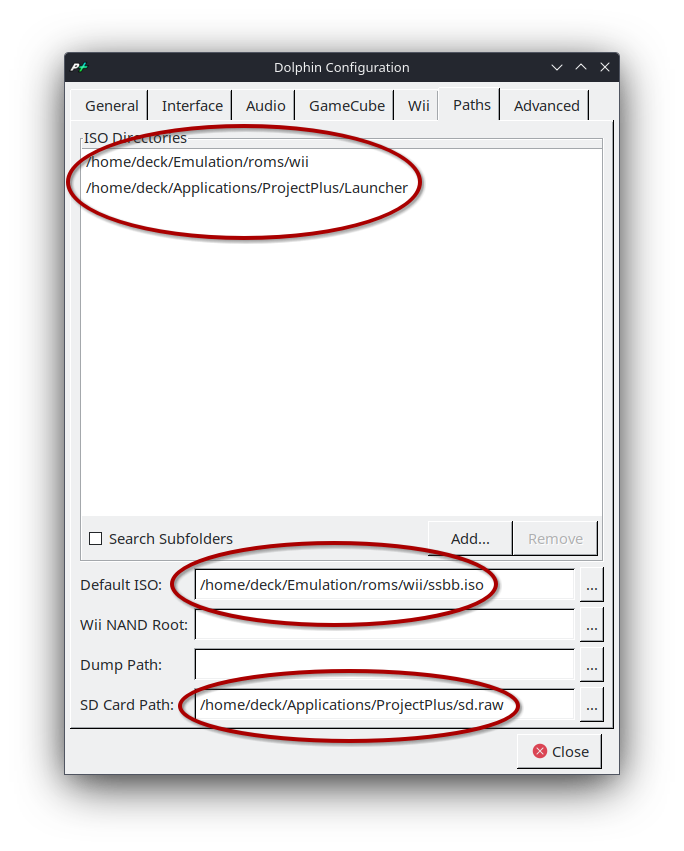
Go to Options -> Configuration. Head over to the “Paths” tab. Add your ISO directory here. In my case my Brawl ISO is located in ~/Emulation/roms/wii, so I will add that path here. You’ll also want to add your Project+ launcher path here – which, if you’ve been following my guide so far, will be located in ~/Applications/ProjectPlus/Launcher.
Next, set Brawl as your default ISO, then set your SD card path to ~/Applications/ProjectPlus/sd.raw. Your paths configuration will probably look similar to this when all is said and done:
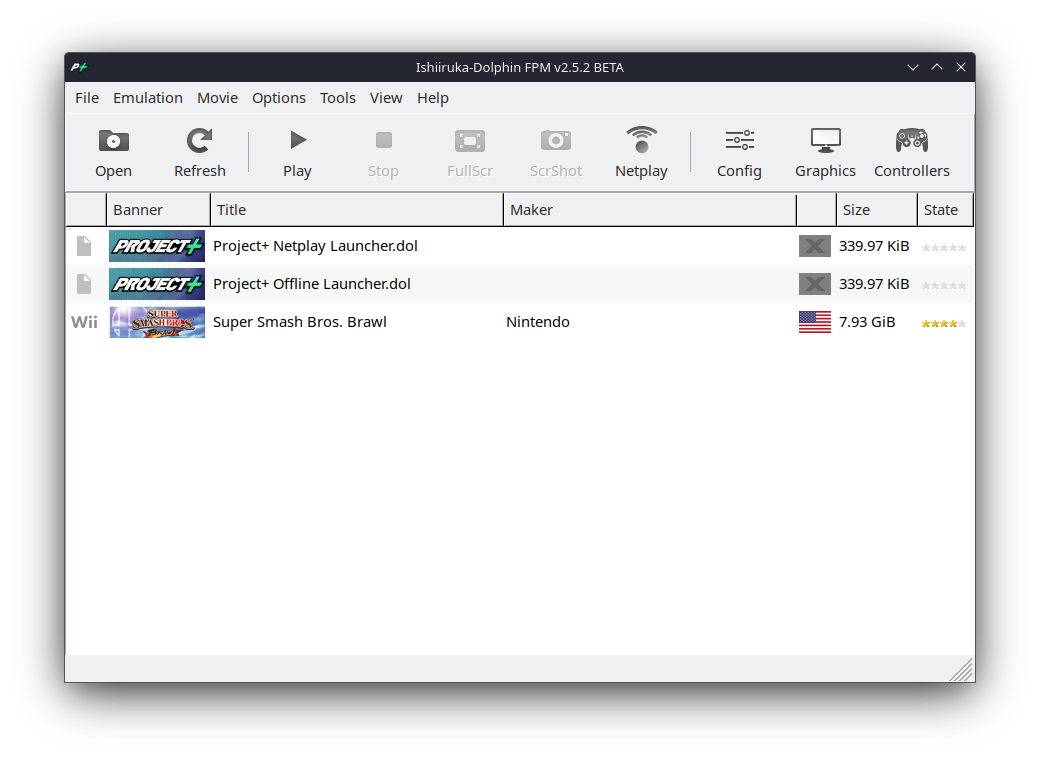
Click “Close” to close the config window. Dolphin’s main menu should now be populated with your Brawl ISO along with Project+’s .elf launcher files: the netplay launcher and the offline launcher.
Graphics
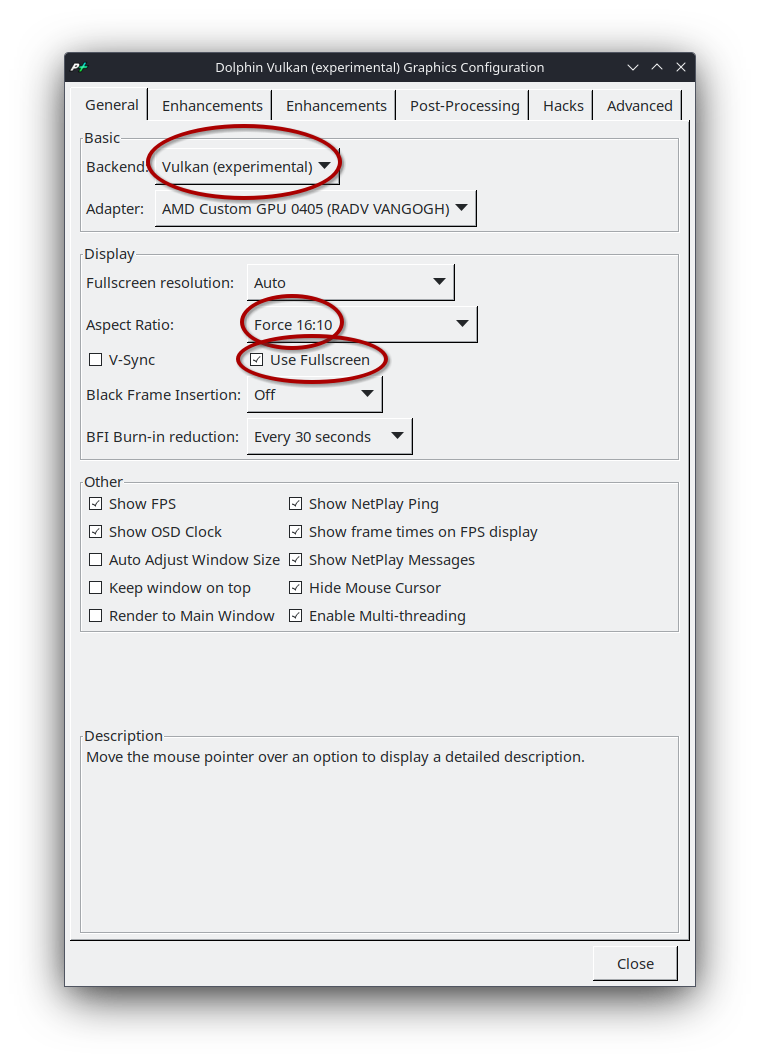
Go to Options -> Graphics Settings. Set the backend to Vulkan; otherwise you may get a blank white screen if you launch the game with OpenGL. Adjust the aspect ratio depending on what monitor you’re using, or set it to 16:10 if you’re using the Deck’s built-in display. Check “Use Fullscreen”.
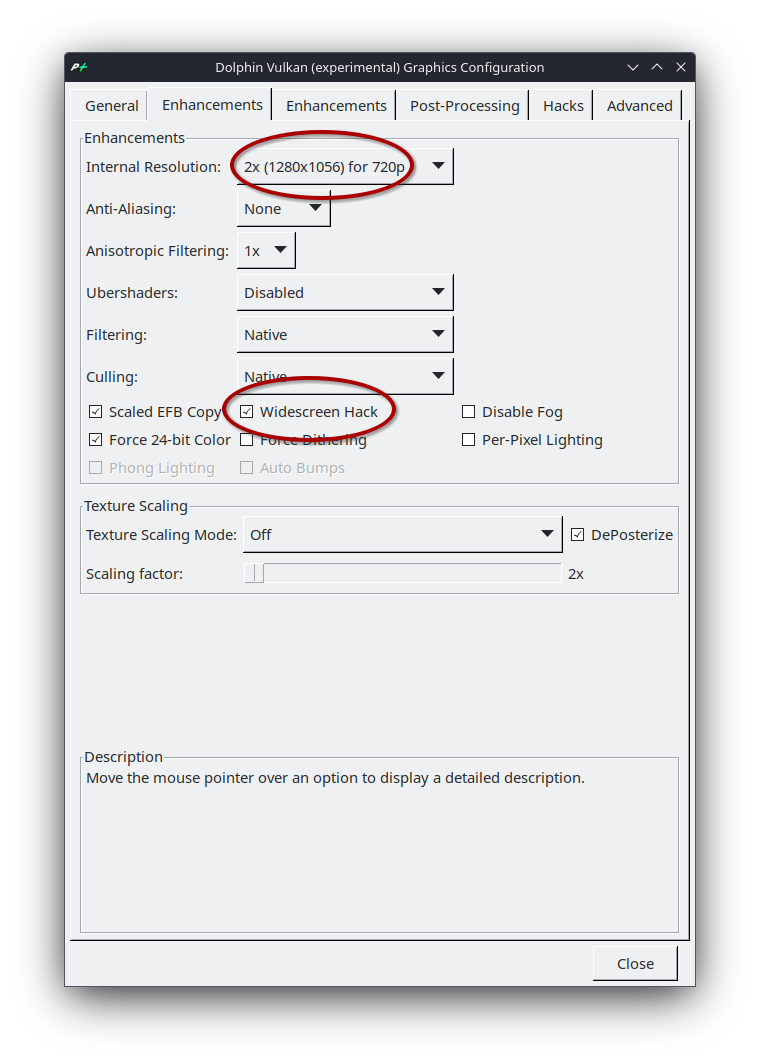
Under the first “Enhancements” tab, set the internal resolution to 2x if you’re using the Deck’s built-in display, or whatever your monitor’s native resolution is if you’re connected to an external display. Note that you may need to experiment with the internal resolution and lower it if you encounter any dips in framerate during gameplay. If you’d like to set the game to widescreen, check “Widescreen Hack” on.
Under the “Advanced” tab, you can optionally check “Load Custom Textures”, but this is something that I do NOT recommend. Loading custom textures without pre-fetching them can make the game stutter-y. Checking “Prefetch Custom Textures” will simply cause the emulator to crash. Still, if you insist, custom textures can be placed in ~/.local/share/FasterPPlus/Load/Textures/RSBE01/.
Controls
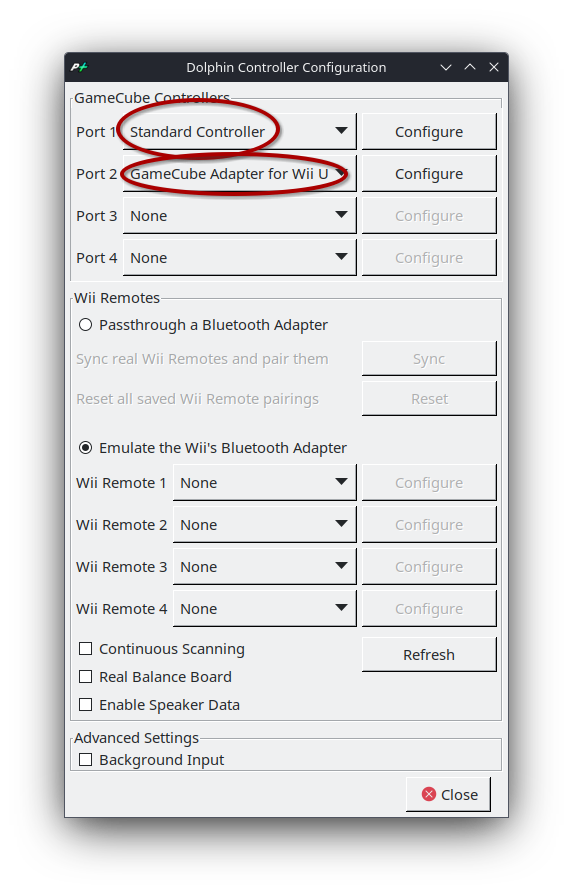
Options -> Controller Settings. If you have a GCC adapter, I recommend setting port 1 to “Standard Controller” for the Steam Deck controls, and port 2 to “GameCube Adapter for Wii U”. Click “Configure” next to the controller port set as “Standard Controller” if you’re planning on using the Deck’s controls.
The device name will vary depending on whether you opened Project+ in Desktop Mode or in Game Mode. The former will likely be called “Valve Software Steam Deck Controller” or something similar. The latter would be “Microsoft X-Box 360 pad 0”. Set the device accordingly from the drop-down menu, then configure your Deck’s controls. Click “Close” when finished.
3. Enjoy
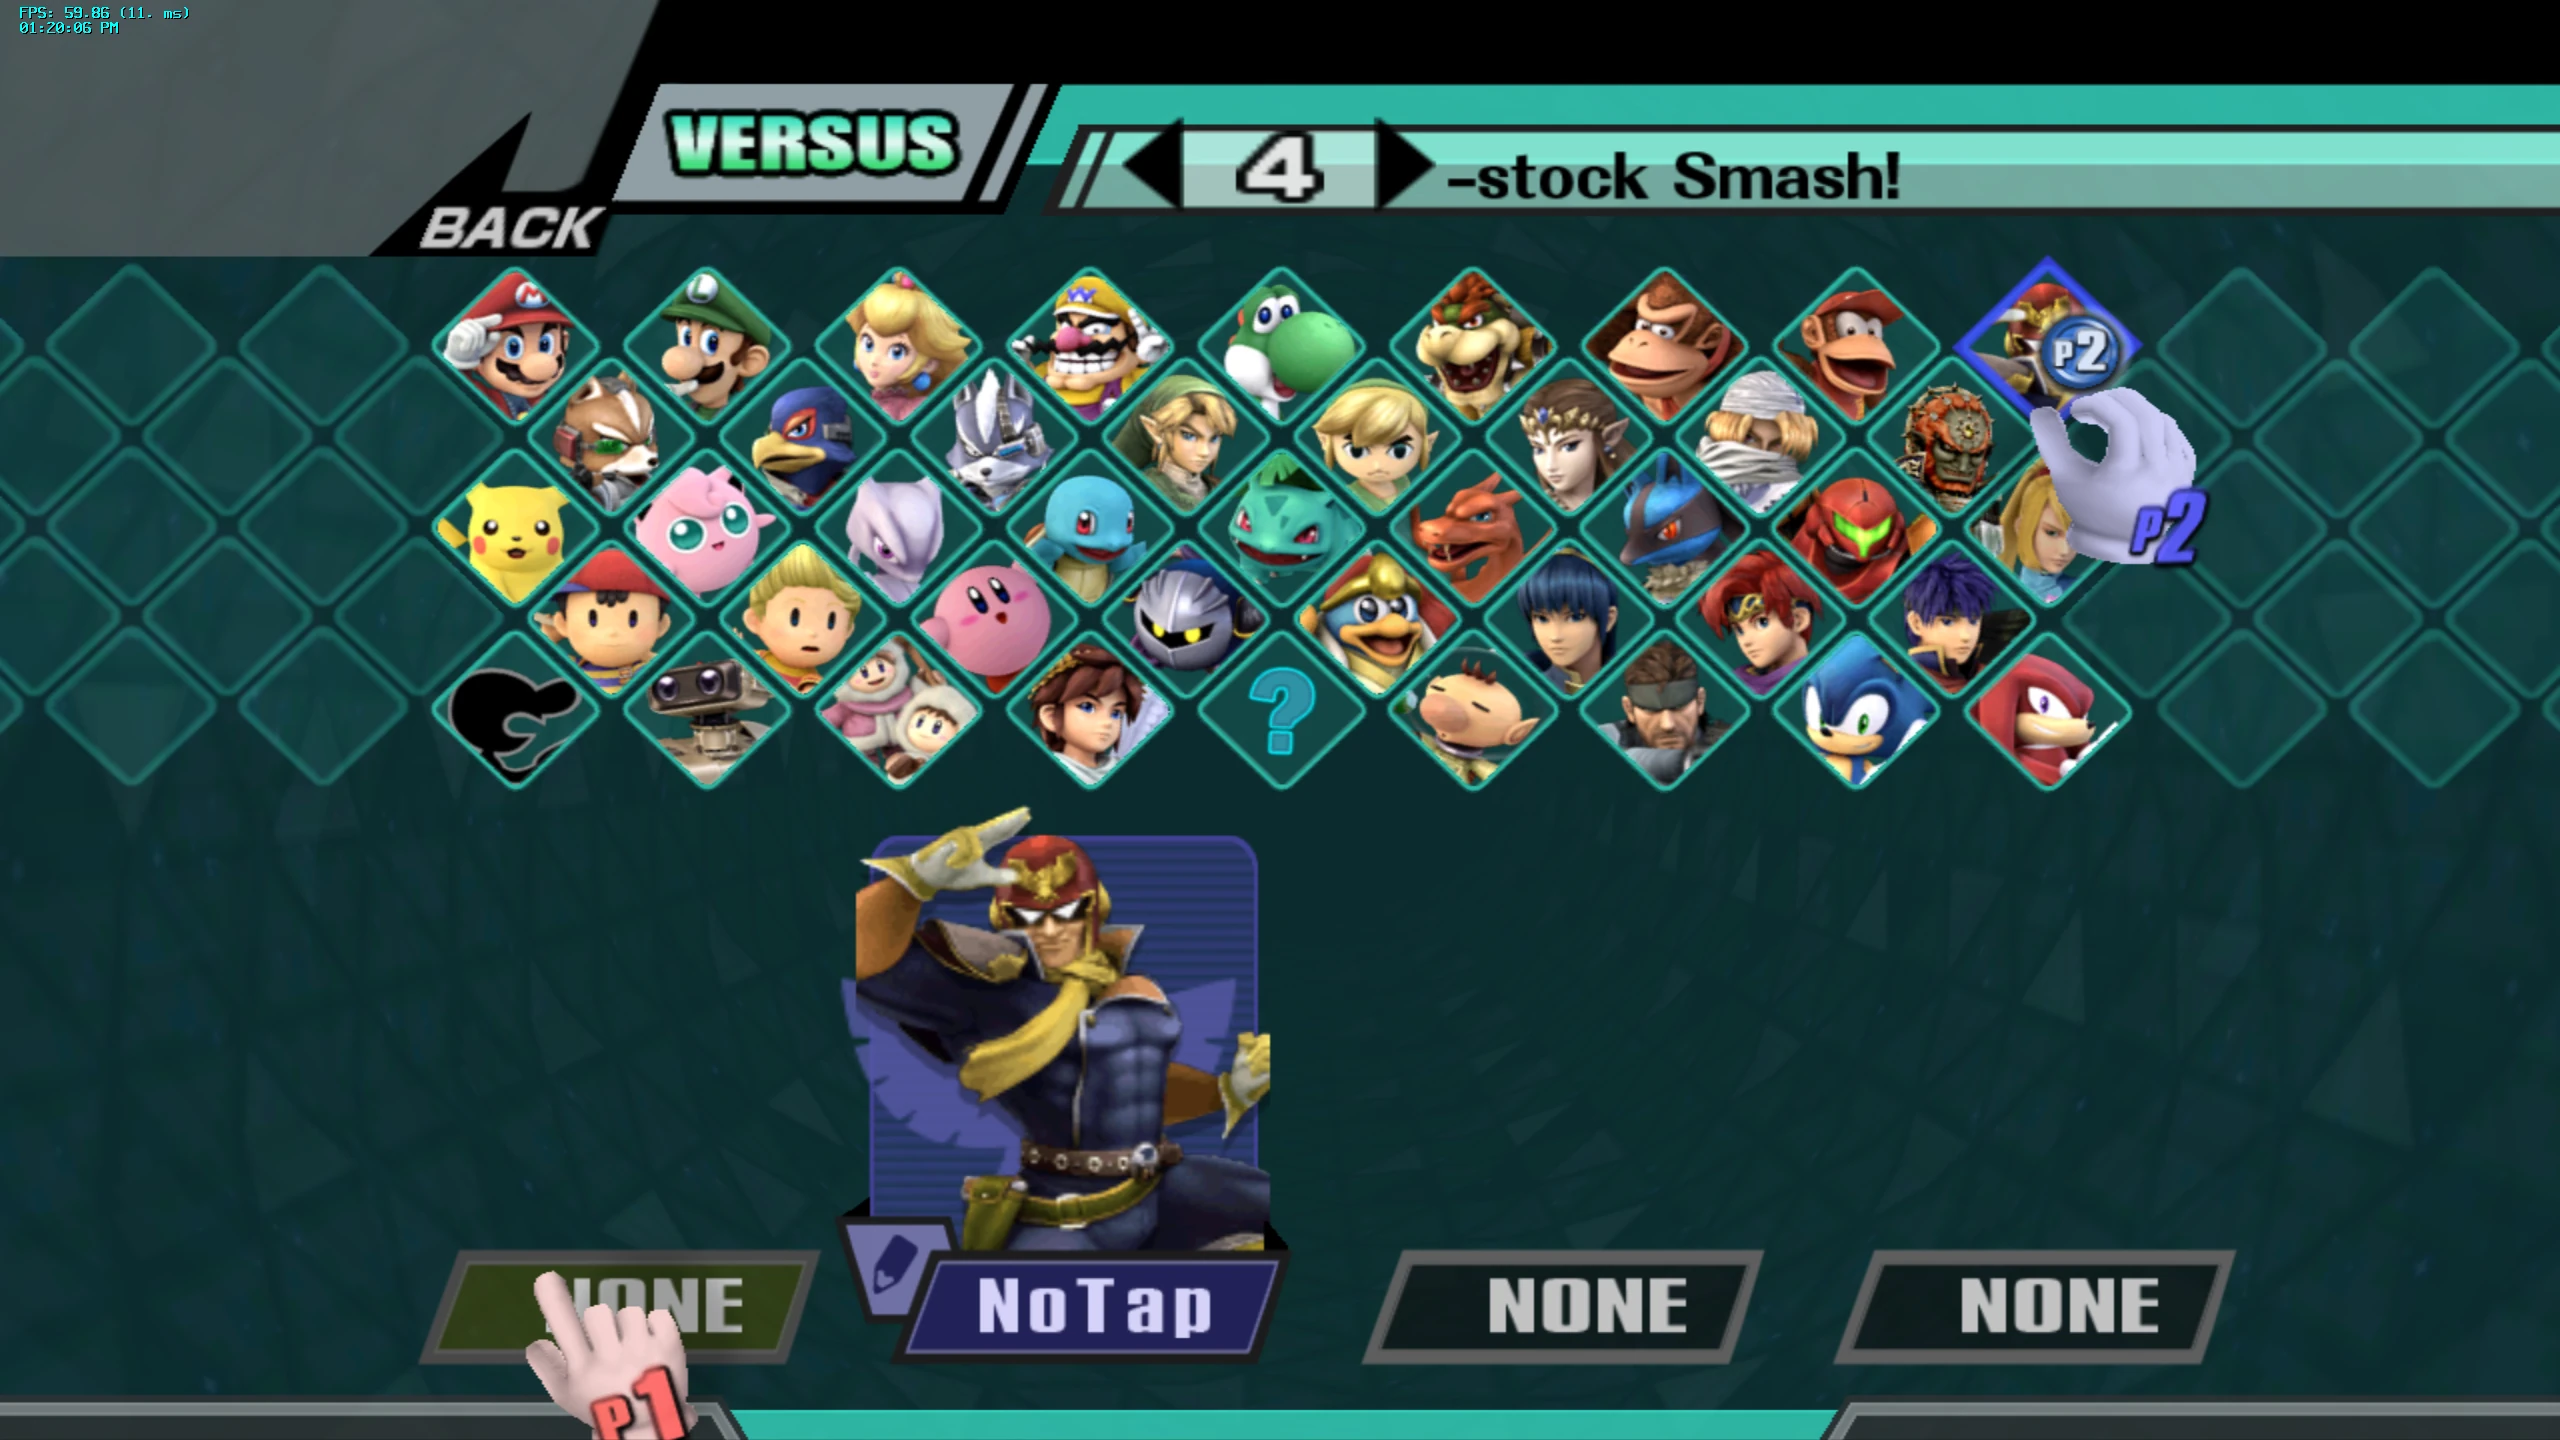
Launch “Project+ Offline Launcher.dol” from Dolphin. If everything went well you should be booted directly into Project+’s character selection screen.
Tips and Tricks
Boot Project+ Directly from Steam
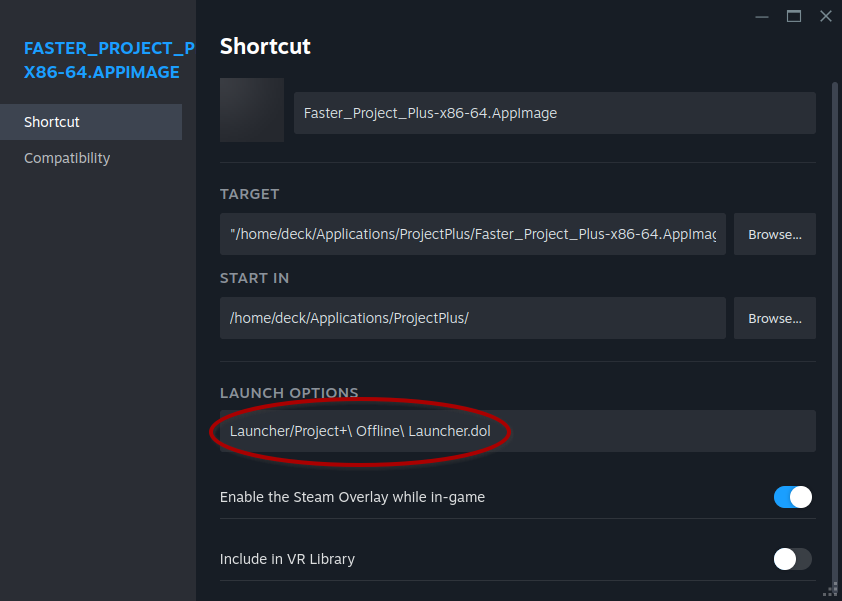
With your file browser, navigate to ~/Applications/ProjectPlus/. Right-click the AppImage, and select “Add to Steam”. Project+ will now be available in Steam. If you wish to launch Project+ immediately without having to interact with Dolphin, add this under the “Launch Options” text field in the non-Steam shortcut’s Properties menu:
Launcher/Project+\ Offline\ Launcher.dol
Add Artwork
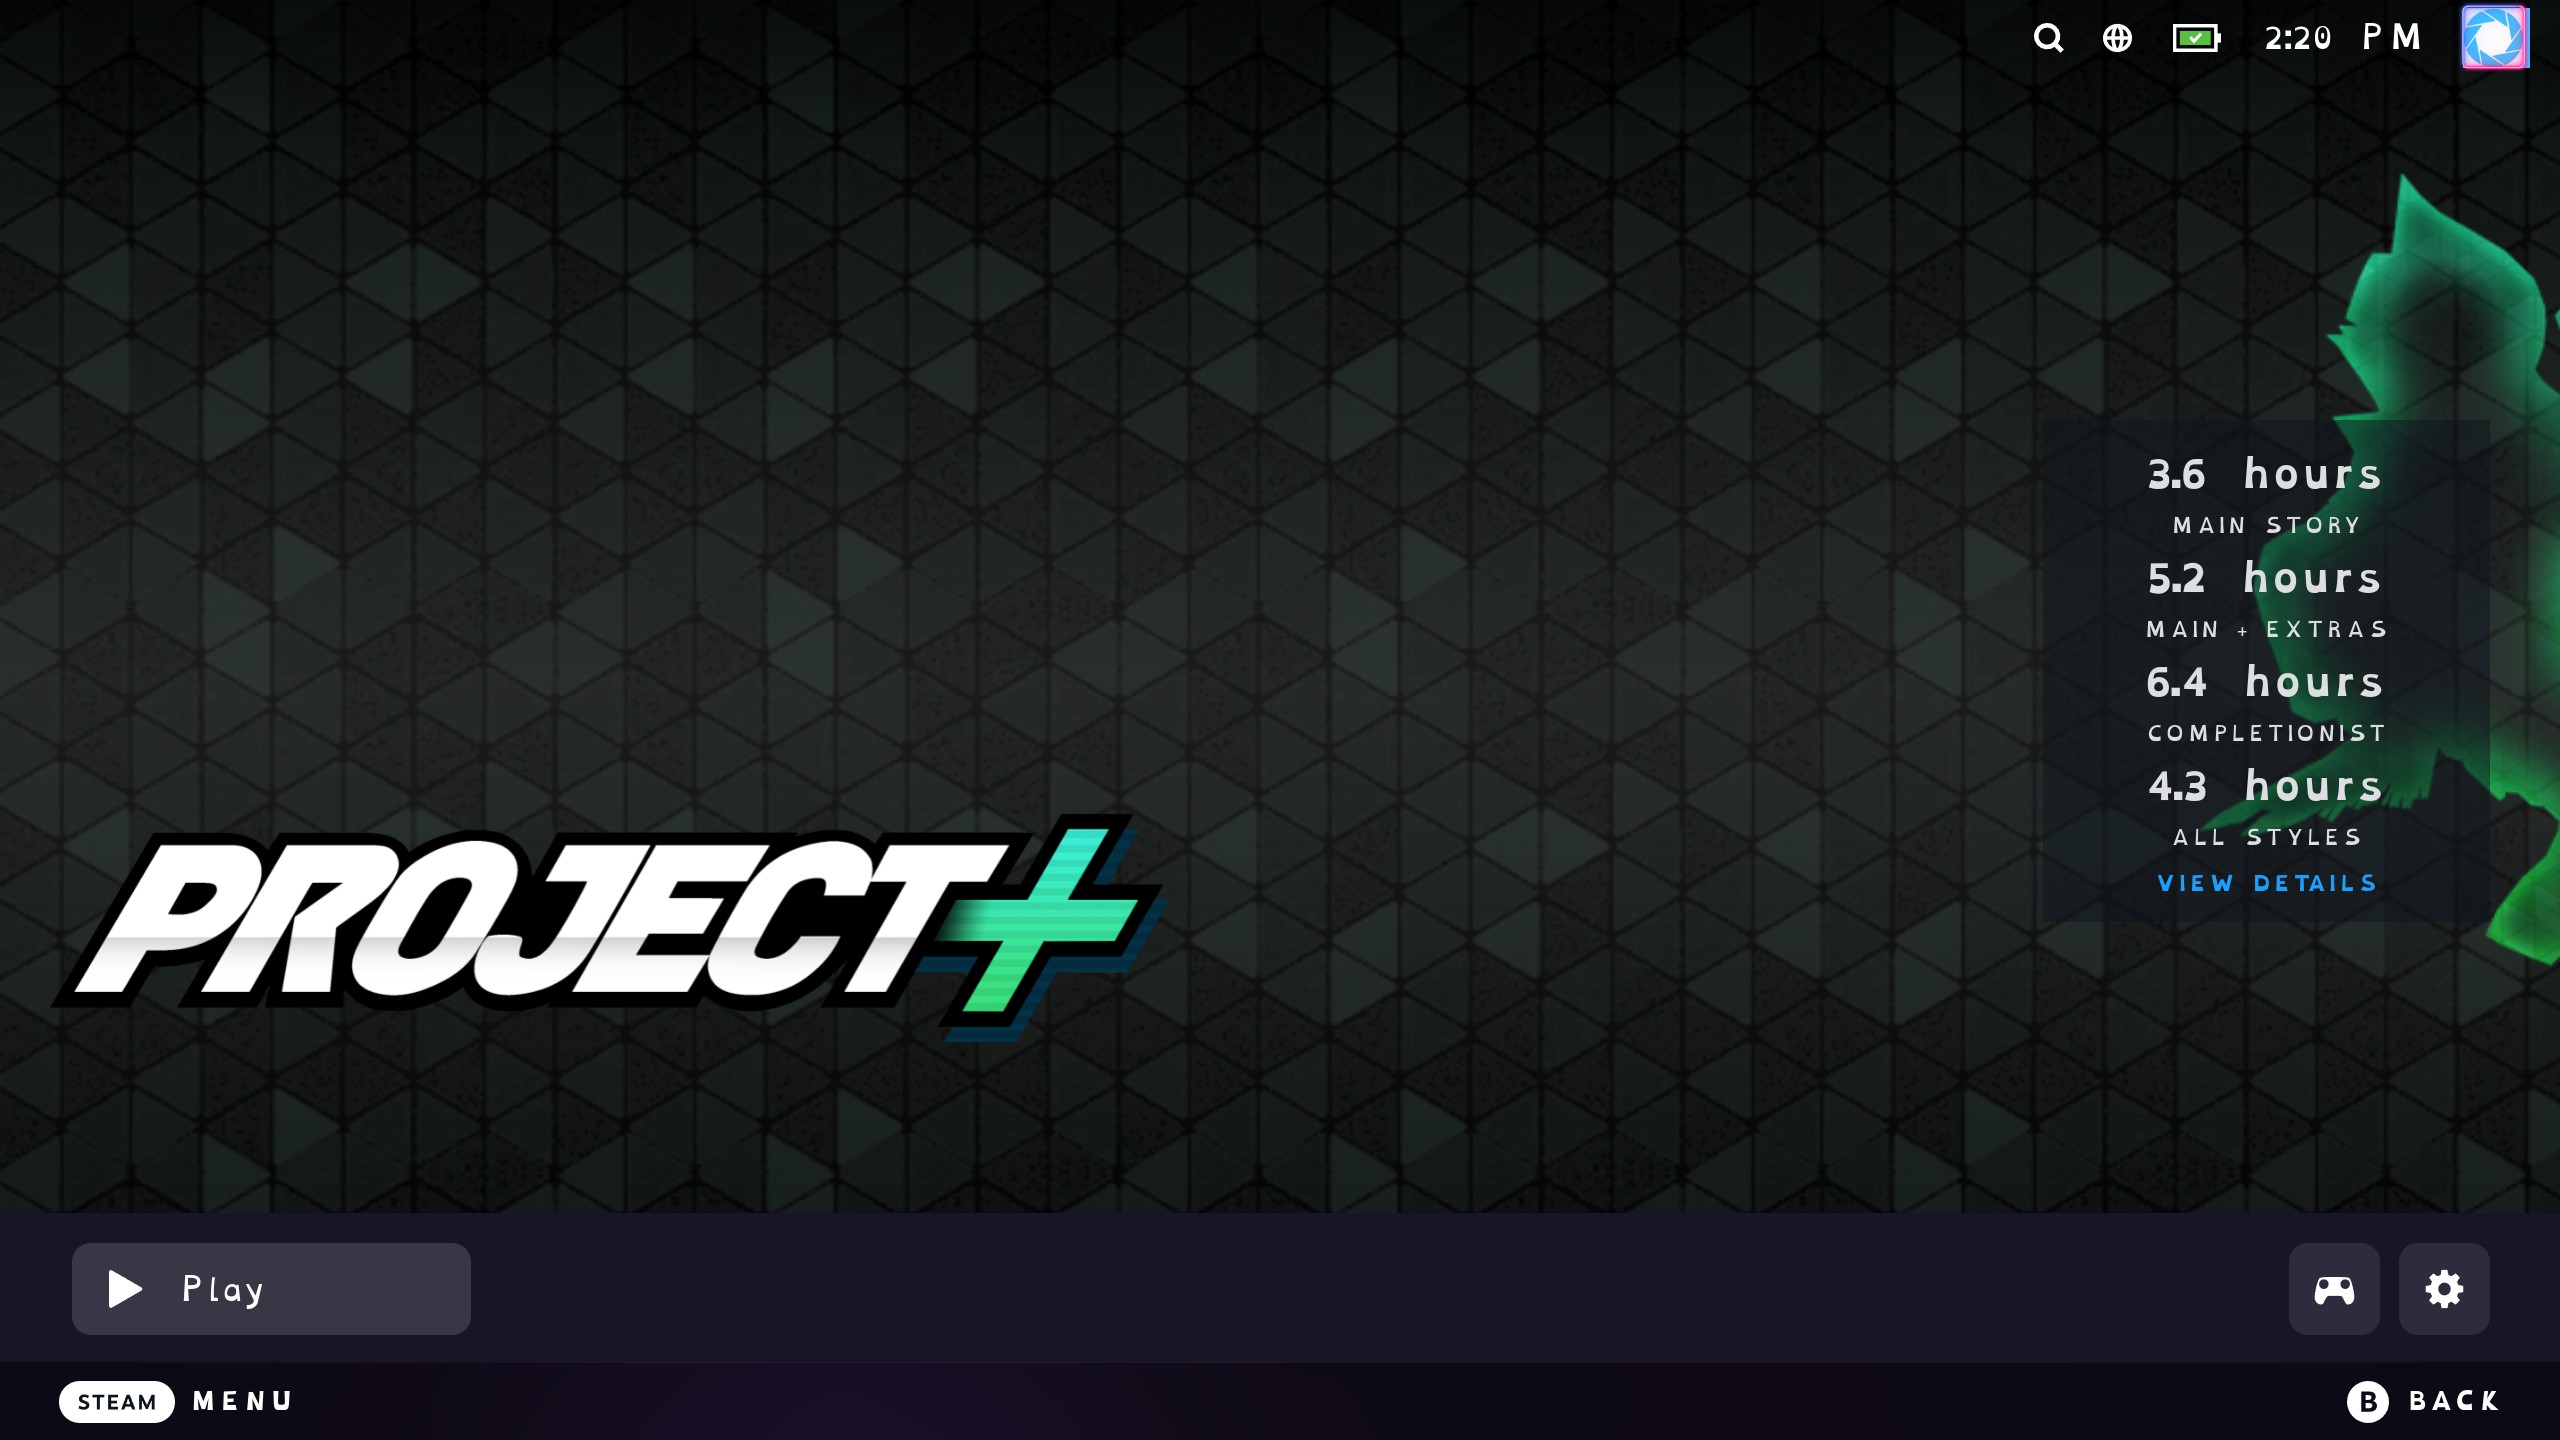
Once you have Project+ added to Steam, you can customize the non-Steam shortcut’s artwork in Game Mode. First, in Desktop Mode, from the game’s Properties window in Steam, rename the shortcut to “Project+”. Close the Properties window. Get Decky Loader installed, then install the SteamGridDB plugin in Game Mode. Now you can add custom artwork for Project+ by pressing Start and selecting “Change Artwork…”
Overclock the GCC Adapter
If you’re using a GameCube controller, I highly recommend overclocking the adapter for a more responsive input to your controls.
Netplay
I’m going to be frank here: netplay with Project+ is hit or miss. It’s not like Slippi, which uses rollback netcode. Project+ uses Dolphin’s delay-based networking to play against online opponents. During my netplay sessions I’ve also noticed a lot of sporadic desync issues, usually because my ISO’s checksum is different than my opponent’s. In other words, we’re running different versions of the same game.
That being said, if you still want to play online, here’s how it works: you either host the game, or you connect to someone else who is hosting. In Dolphin, click “Netplay”. In the event you’re hosting, click the “Host” tab. Set a name for yourself. Select “Project+ Netplay Launcher.dol” from the list and click “Host”. In the new window that opens, you’ll be presented with a room code next to the “Room” drop-down menu. Click “Copy” to copy this code, and then send this to your opponent. Your opponent would then paste this code into the “Host Code:” text field from the “Connect” tab in the main netplay window, then click “Connect” to join your lobby.
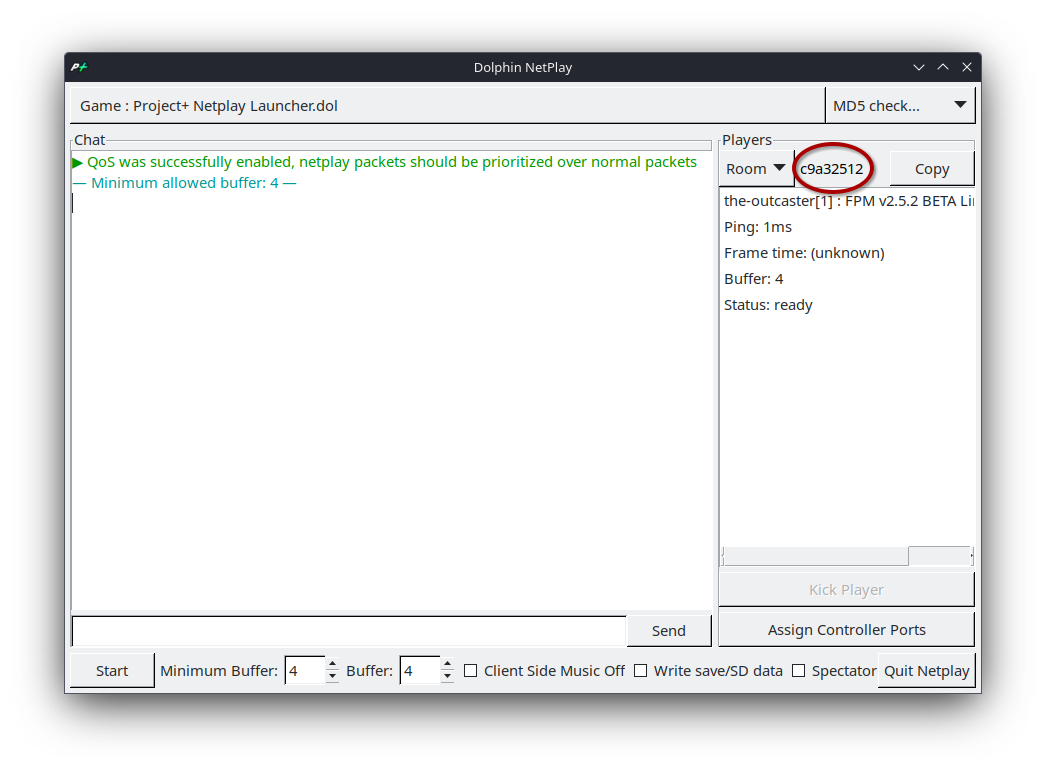
From here, the two of you can exchange messages with each other, adjust the buffer, enable or disable the game’s background music, compare checksums, and, of course, start the game. Carefully observe your opponent’s ping. Take this number and divide it by eight. This should be your ideal buffer. For instance, if your opponent has a ping of 40ms, you would set the buffer to 5. Once this is settled, click “Start” to start the netplay session. Note you may have to try this more than once; usually my game freezes on the first try.
If you want to find someone to play with, head over to the Project+ Discord and under the “Netplay” section on the left, find the channel appropriate to your region.
This being said, there may be some good news for netplay players, thanks to Brawlback. This project aims to bring better matchmaking along with rollback netcode! The project is still work-in-progress, but this should make online multiplayer a much better experience.
Need Help?
Join my Discord and I’ll see if I can help you out, or comment below.
