How to Play Slippi (Smash Bros. Melee online) on Steam Deck

Prior to COVID-19, players who wanted to verse each other in Super Smash Bros. Melee would have to do so locally. Thankfully, it wasn’t all bad news during the lockdown. Project creator Fizzi, along with several other key contributors, didn’t just sit around with their thumbs twidling. They actively went to work implementing rollback netcode to the classic 2001 title, which would allow players across the globe to battle with each other from the comfort of their home. This project would become known as Slippi, a fork of the Dolphin emulator that incorporates this feature. The great thing is, Slippi is available for Steam Deck/Linux, Mac, and Windows, and it has cross-play between all three operating systems.
So let’s get started on setting this up on Steam Deck!
Requirements
You will need a backed-up copy of your Melee disc. The disc will need to be version 1.02 and be either a North American or Japanese copy (the PAL version is incompatible due to various characters getting buffs/nerfs, which could lead to desyncs with other players). To see the version and region, flip the disc onto its backside, and examine the text surrounding the inner circle.
In my case, the disc reads as follows: DOL-GALJ-0-02. “J” tells me it’s the Japanese version of the disc. “02” tells me it’s version 1.02. If you have the 1.02 version of the North American copy, it will likely read as DOL-GALE-0-02.
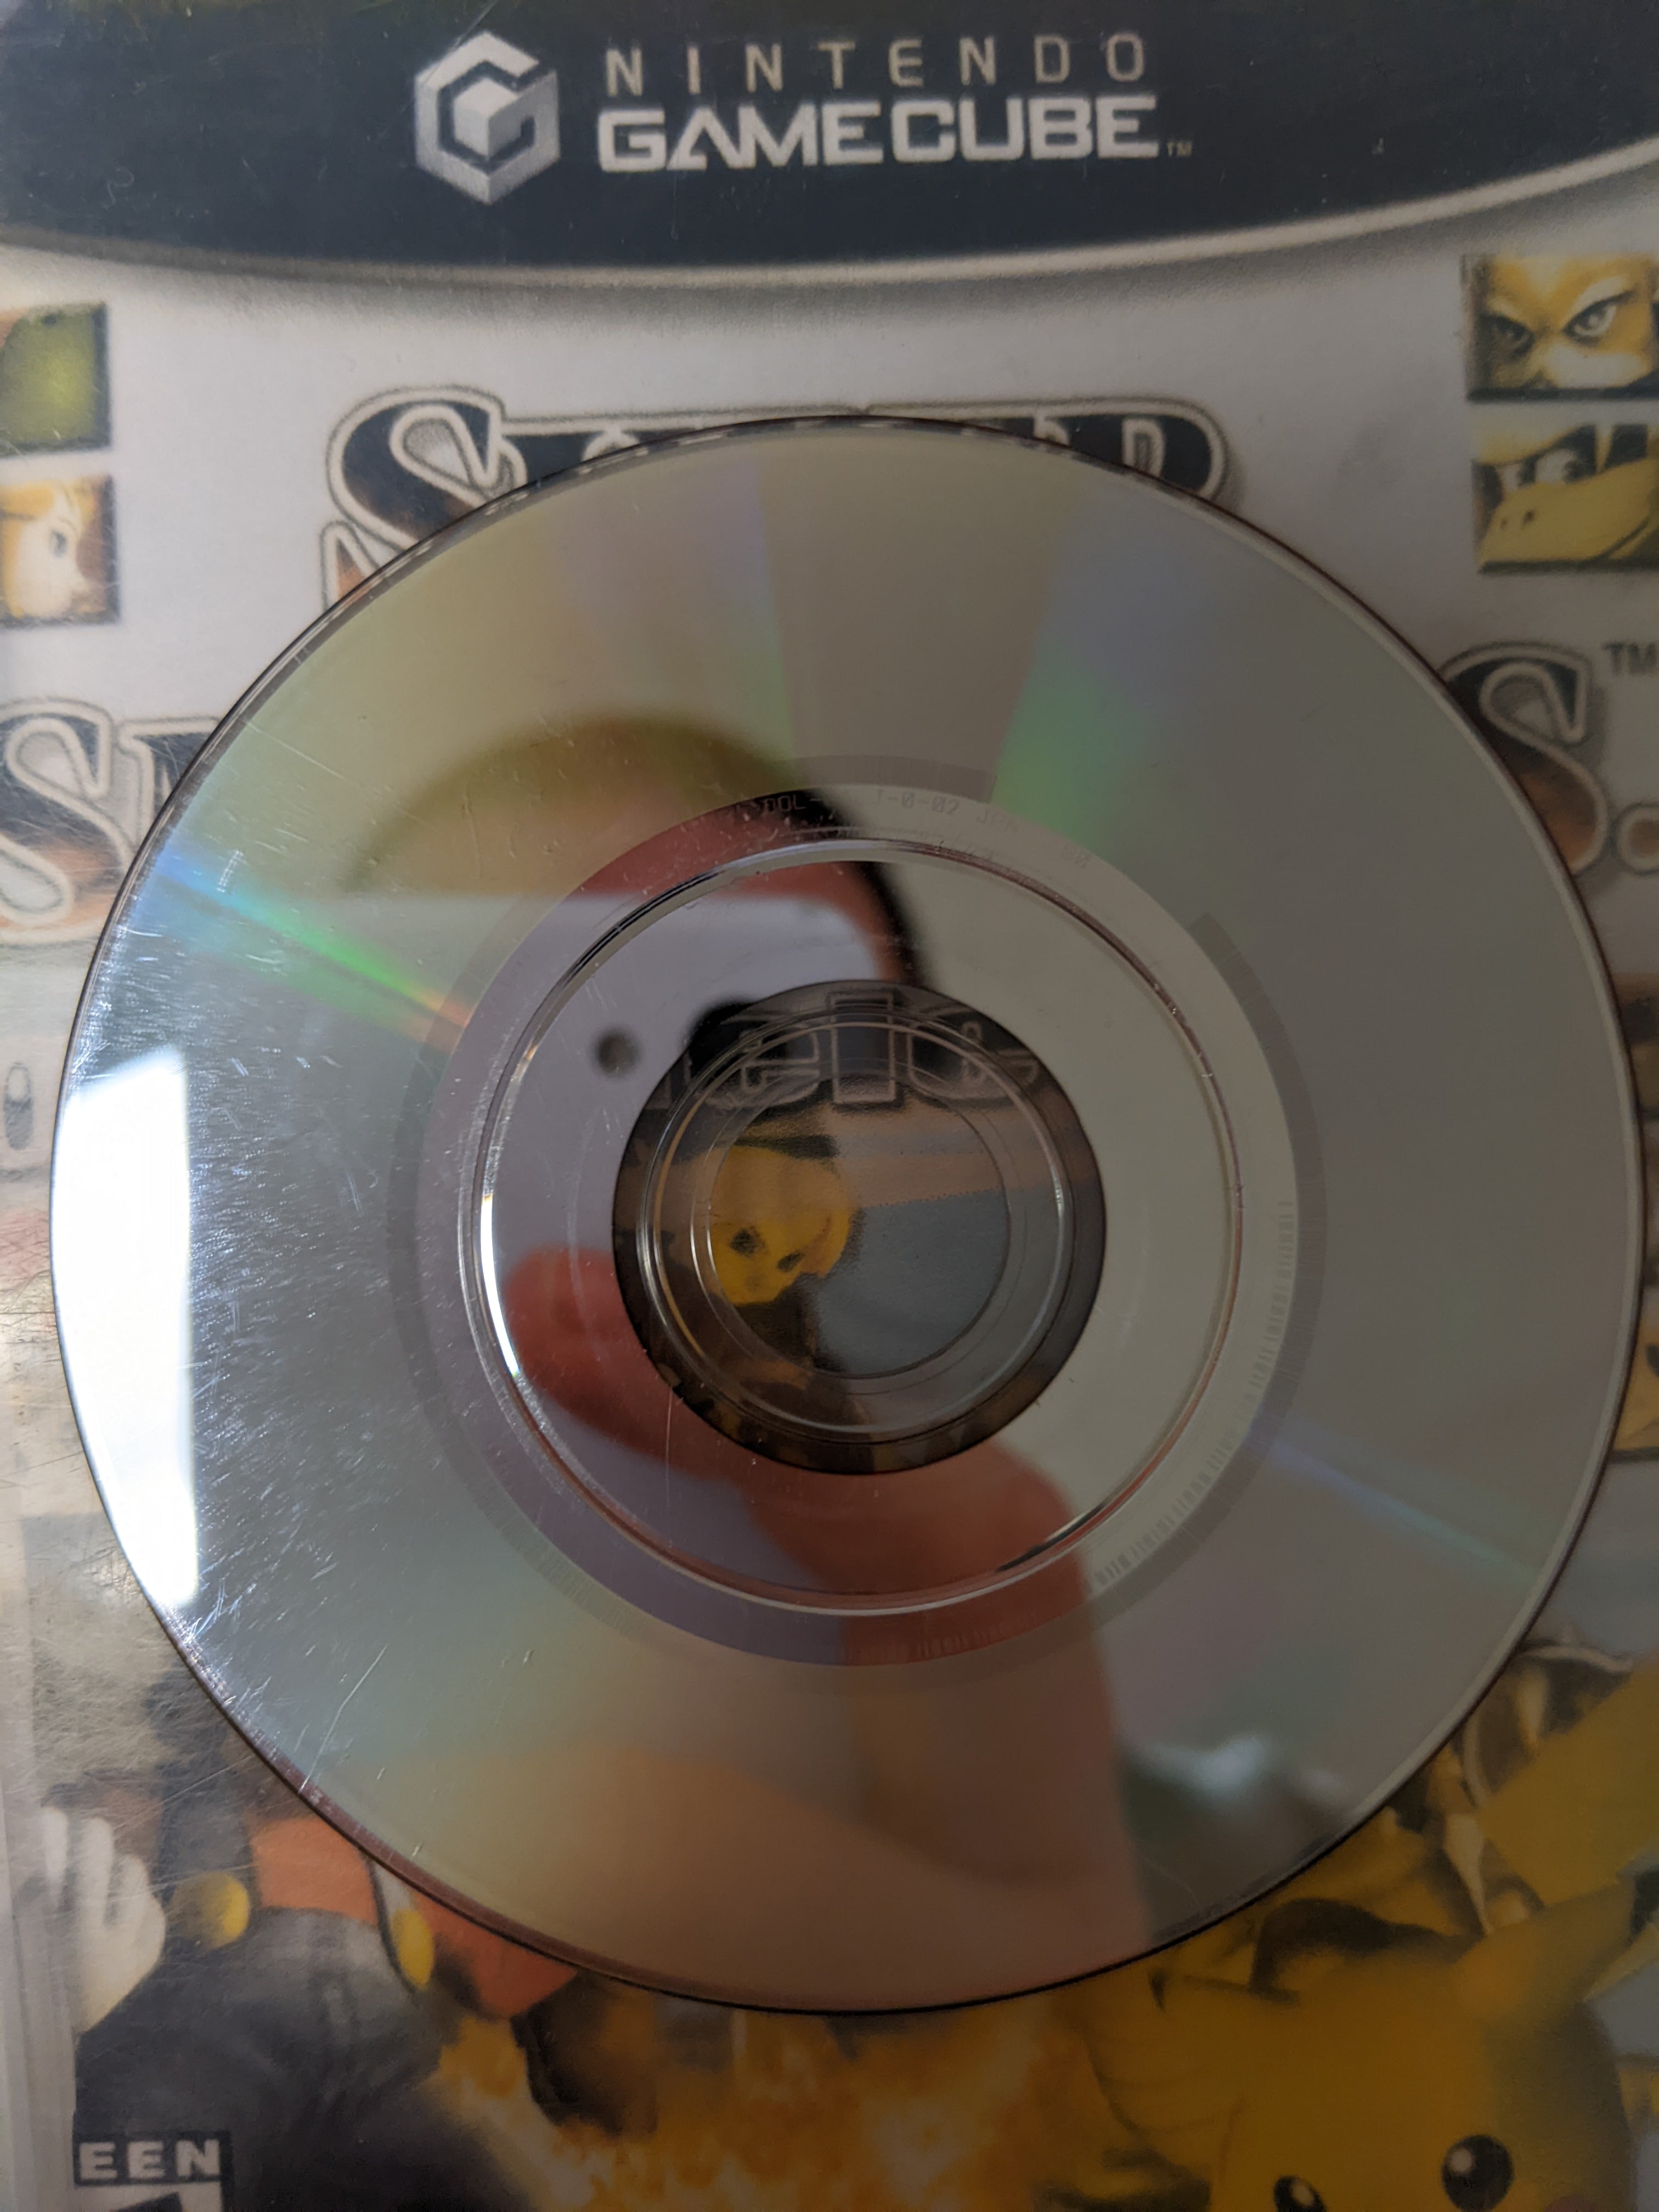
If you don’t already have your disc dumped, take your Wii out of the closet and rip it with CleanRip, then transfer the ISO to your Steam Deck. I recommend putting the ISO in ~/Emulation/roms/gc/.
Note: ~ in this case refers to /home/deck/.
Additionally, you will need the following:
- a free Slippi account, which you can sign up for here
- USB-C dock with at least two USB ports and an Ethernet port
- Ethernet cable
- (optional but recommended) GameCube controller with a GameCube controller adapter (could be the third-party Mayflash adapter or the official adapter by Nintendo…if you can actually find one without breaking the bank)
1. Get Slippi and Sign In
Sign up for a Slippi account if you haven’t already. All you need is an email account, a password, and a display name for when you’re playing against others.
If you’re on your Steam Deck and on the Slippi homepage with your web browser, the website should automatically detect that you’re using Linux. Click “Download for Linux” and your web browser will download Slippi as an AppImage. Save the AppImage to the desktop.
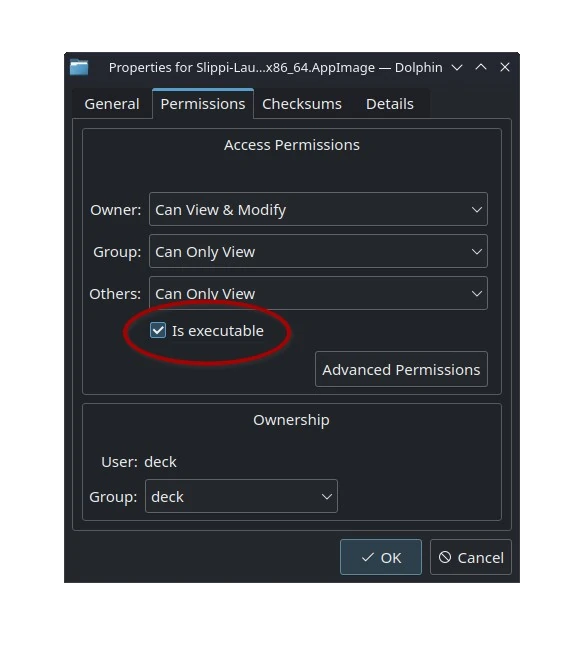
Right-click the AppImage and go to “Properties…” In the Permissions tab, make sure “Is executable” is checked, then click “OK”.
Double-click the AppImage to open the Slippi Launcher.
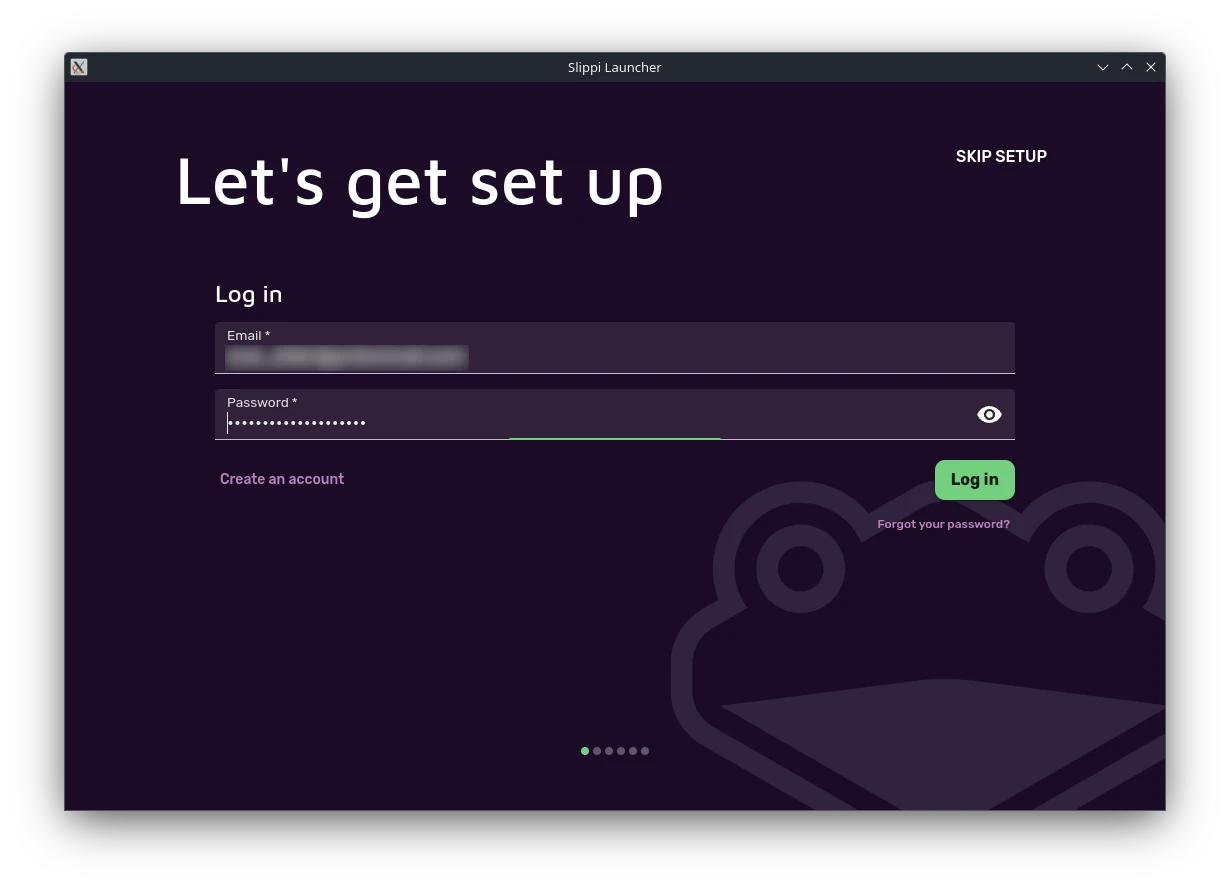
You will be asked to login to your Slippi account in the new window that opens. Enter your email and password to proceed.
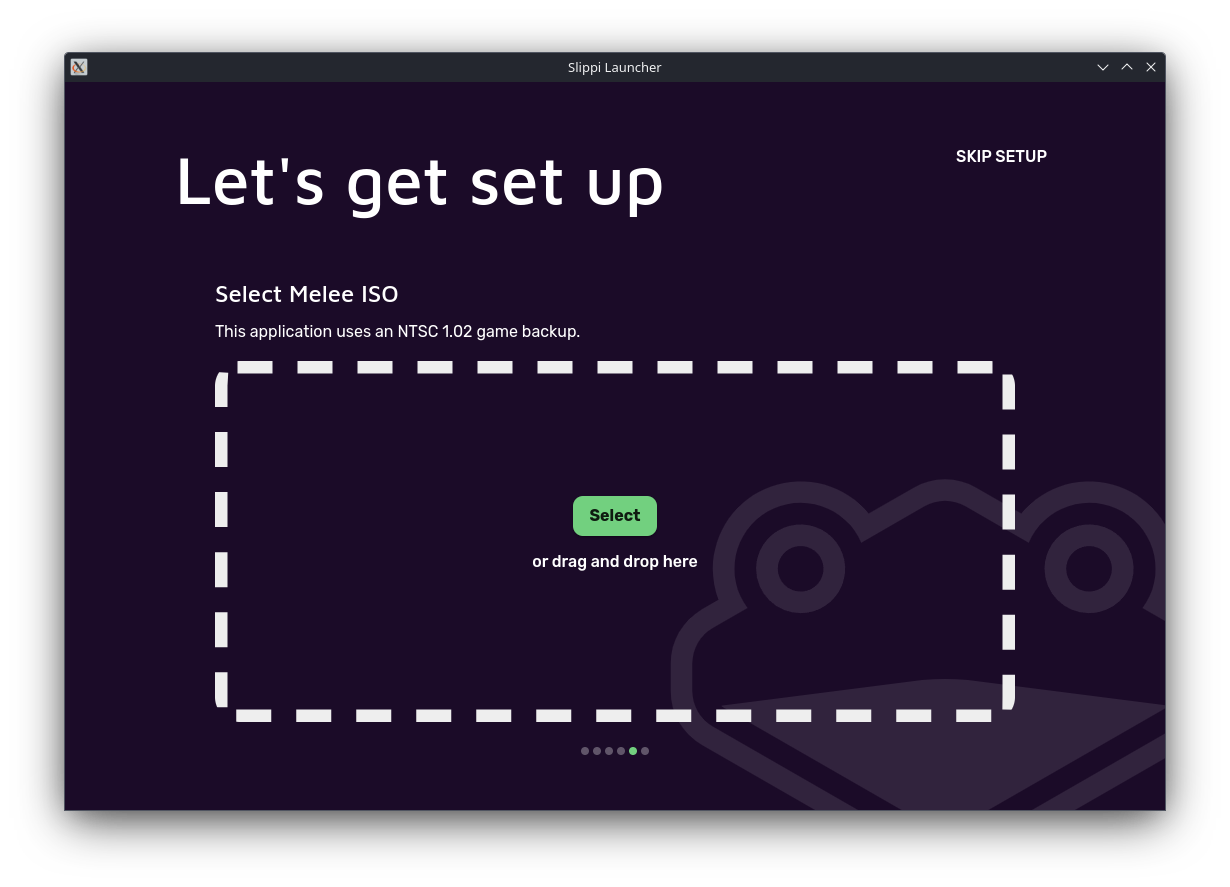
Slippi will then ask you to select your ISO to verify it. Drag and drop the file, or manually select with your file manager.
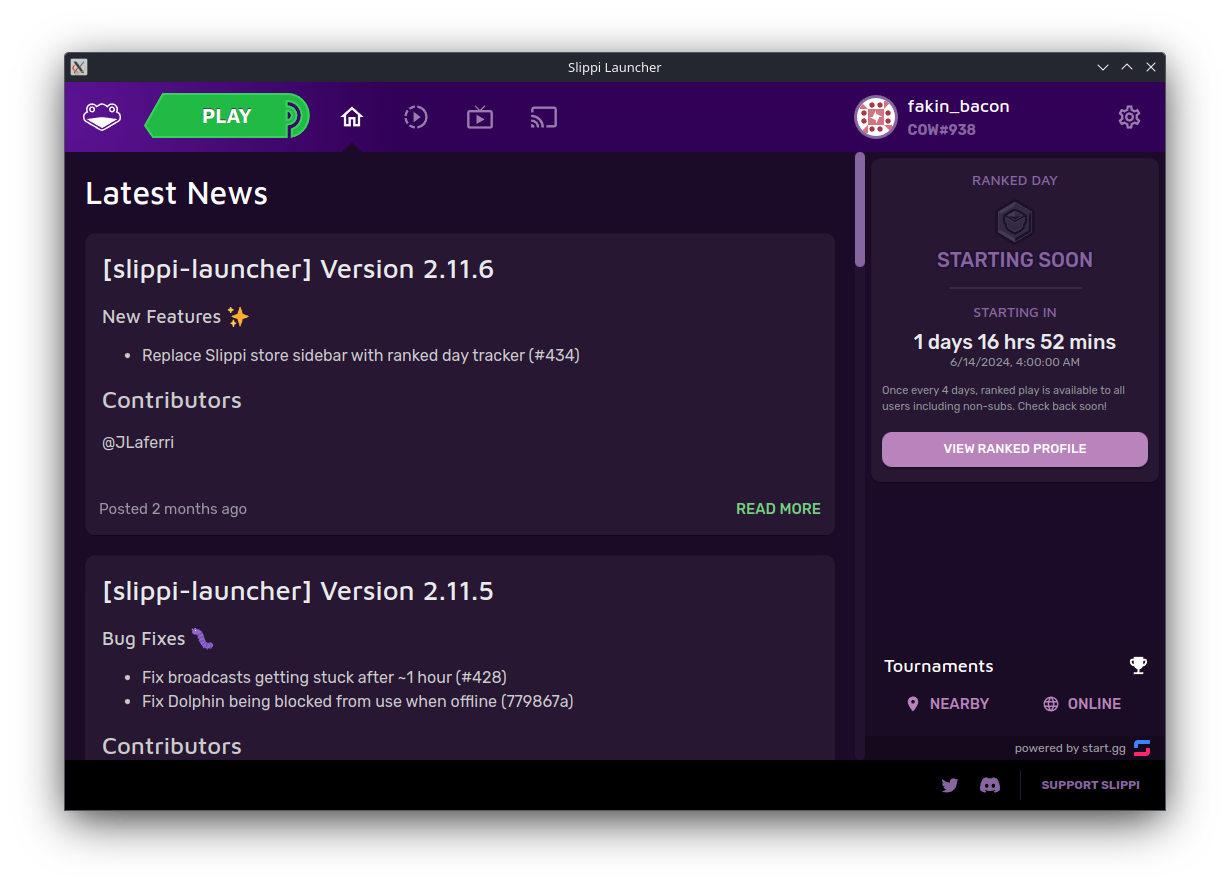
If the ISO is successfully verified, click “Continue” and you should be greeted with the main menu.
2. Configure Settings and Controls
Click the Settings icon in the Slippi Launcher. Change “Launch Melee” to “Launch Dolphin” under the Play Button Action section, since we will need to configure a few settings prior to playing.
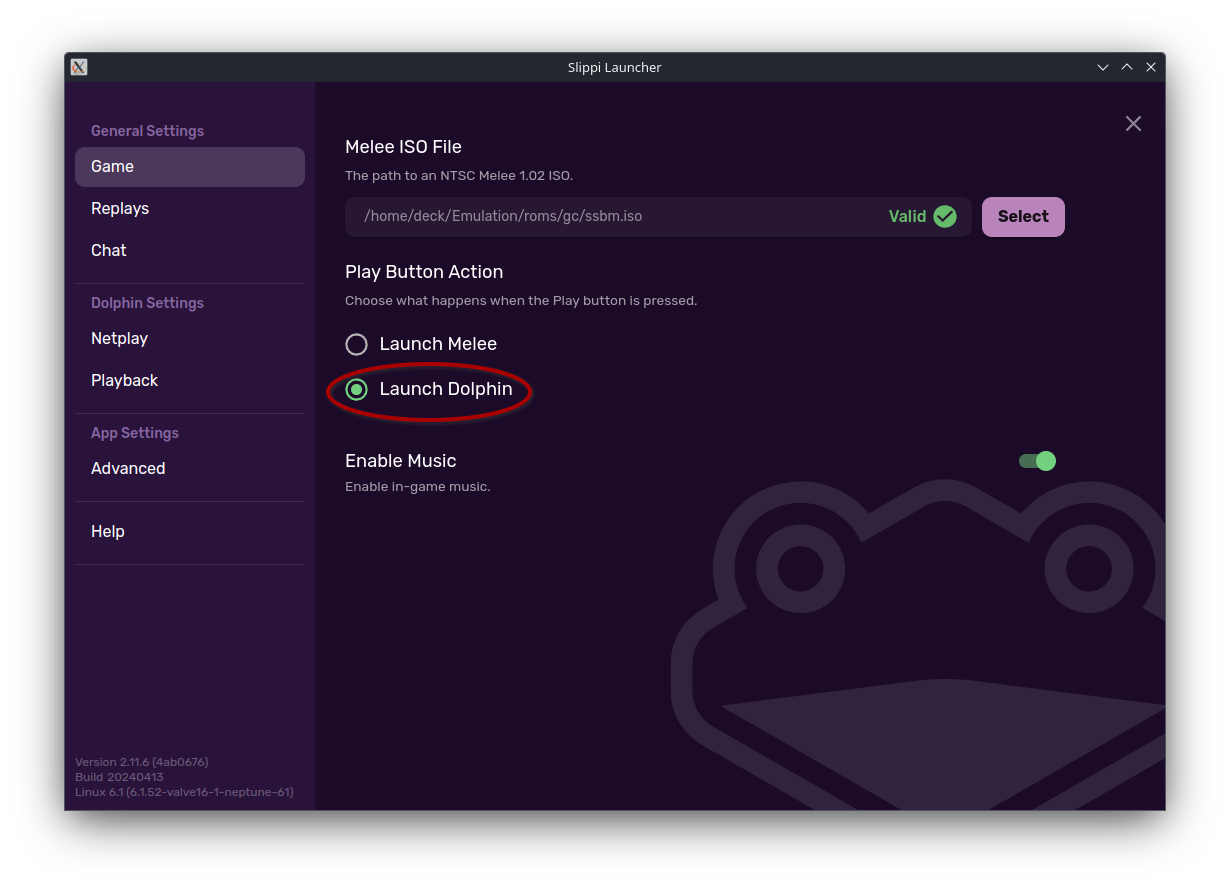
Click the “X” in the top-right corner of the window to close the Settings menu, then click the green “PLAY” button to launch Dolphin.
General Configuration
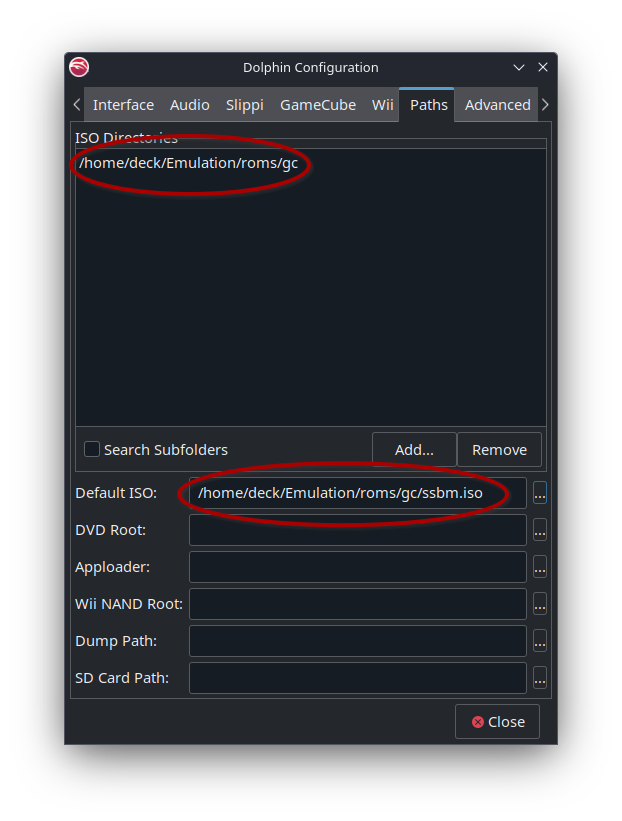
Go to Options -> Configuration. Go to the “Paths” tab. Set your ISO path here by selecting “Add…” and add your ISO directory containing your Melee ISO. Next, click the three-dotted button next to the “Default ISO” text field, and select your Melee ISO to set it as default.
Graphics
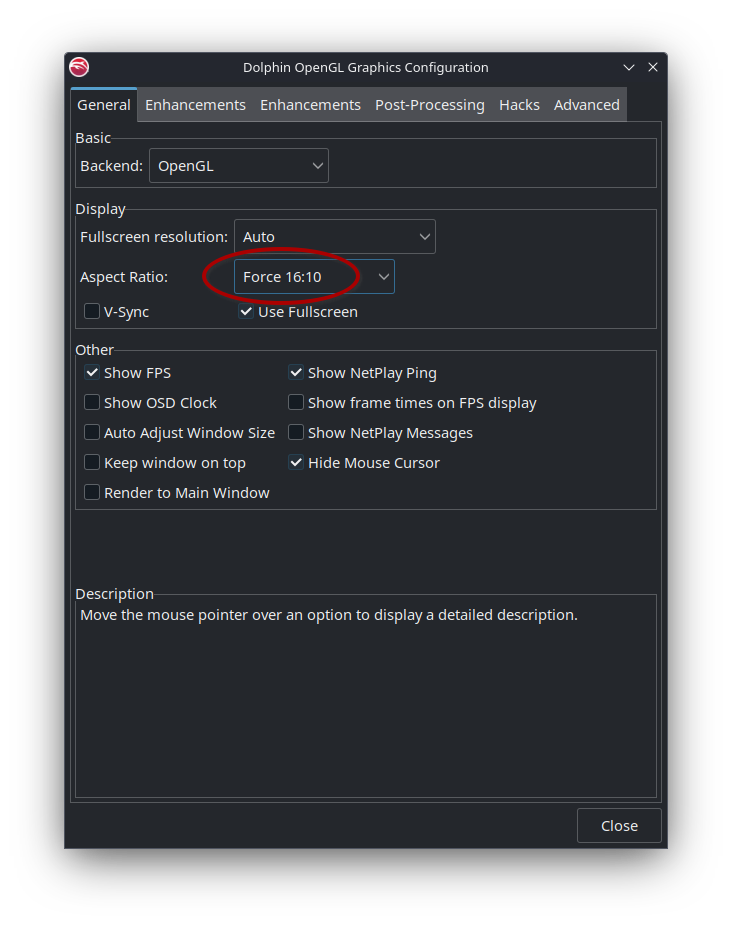
Close the Configuration window. Your Melee ISO should now be displayed from the main window in Dolphin. Go to Options -> Graphics Settings. Adjust the aspect ratio to 16:10 if you’re using the Deck’s built-in display. Otherwise, set it to the aspect ratio that your monitor uses, if you’re connected to an external display, which in most cases would be 16:9.
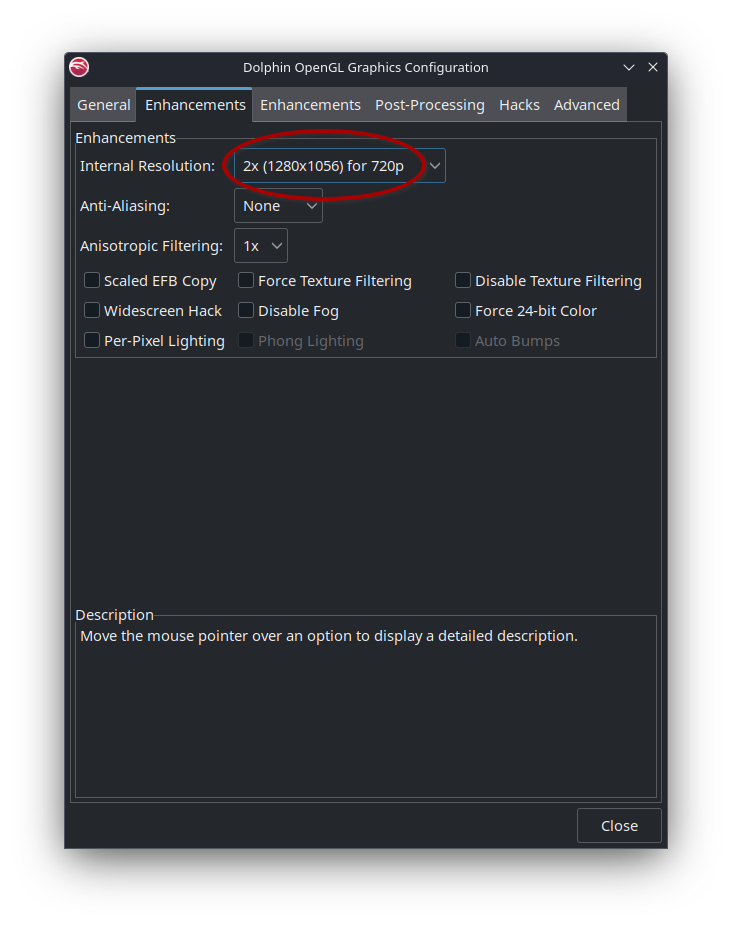
Under the first “Enhancements” tab, adjust the internal resolution to 2x if you’re using the Deck’s built-in display. If your Deck is connected to an external monitor, adjust the internal resolution to whatever your monitor’s native resolution is. Note that if you see any dips in framerate in-game, you may want to lower the internal resolution and see if that helps.
Controls
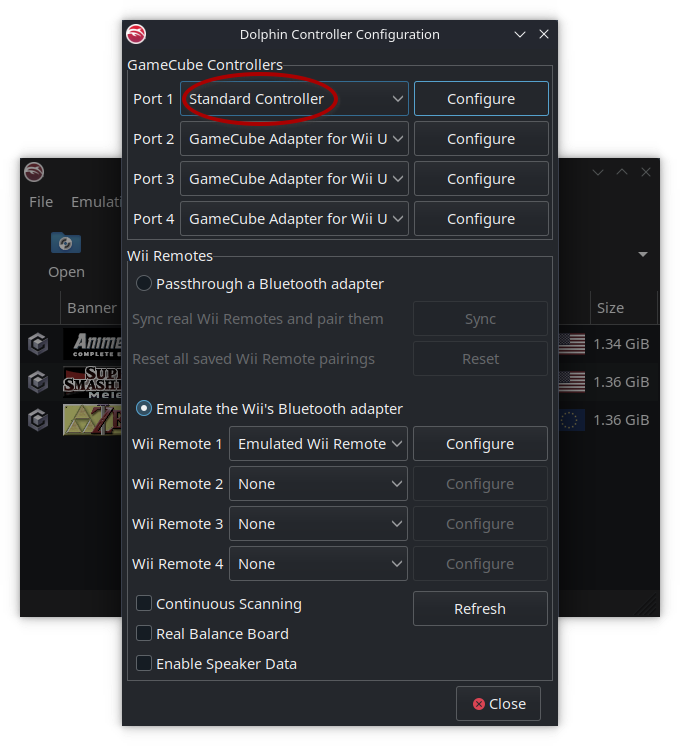
Close the Graphics configuration window. Go to Options -> Controller Settings. If you have a GameCube controller adapter, I recommend plugging your controller into the second port. That way, you can still play the game with your GameCube controller while being able to use the Deck’s built-in controls with port 1. Click the drop-down menu next to Port 1, and select “Standard Controller”.
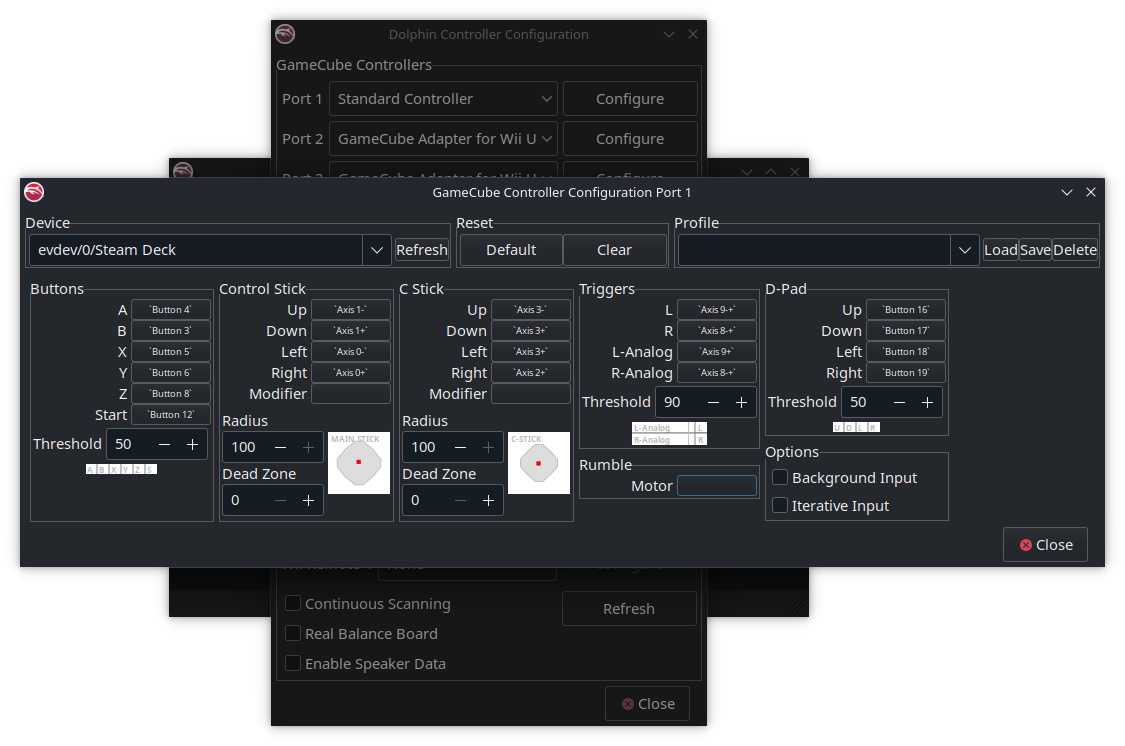
Next click “Configure”. Under the drop-down menu for “Device”, set it to “Steam Deck” (note that this name may be different if you’re launching Slippi from Steam and could be labeled as “Microsoft X-Box 360 pad 0”). Now assign your controls to your liking and close both controller configuration windows when finished.
(Optional) Gecko Codes
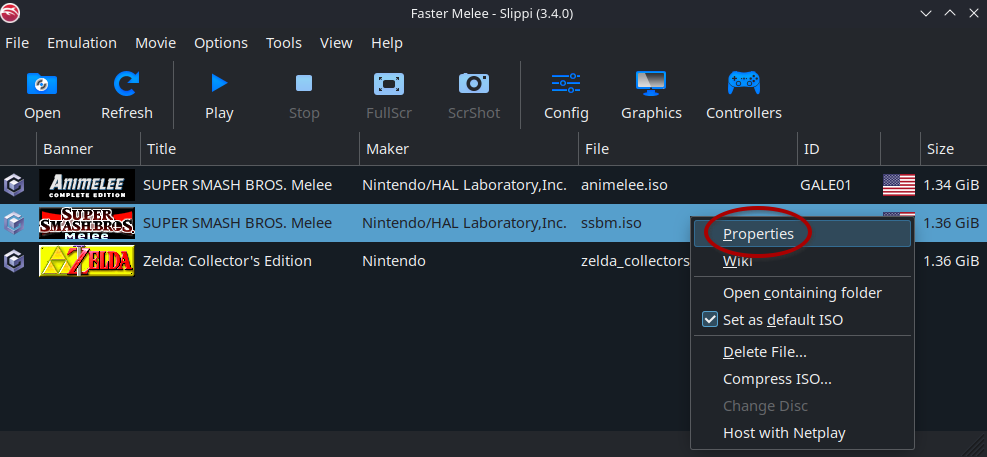
Almost done. Right-click your Melee ISO from Dolphin’s main menu, and select “Properties” from the context menu.
Go to the “Gecko Codes” tab. Here, we can enable some optional codes that will optimize our playing experience. Checking these options will be entirely up to you, but I recommend checking on the following:
- widescreen 16:9
- center align 2P HUD
- flash red on failed L-cancel
- show friendly player indicators (makes it easier to identify yourself when you’re playing doubles)
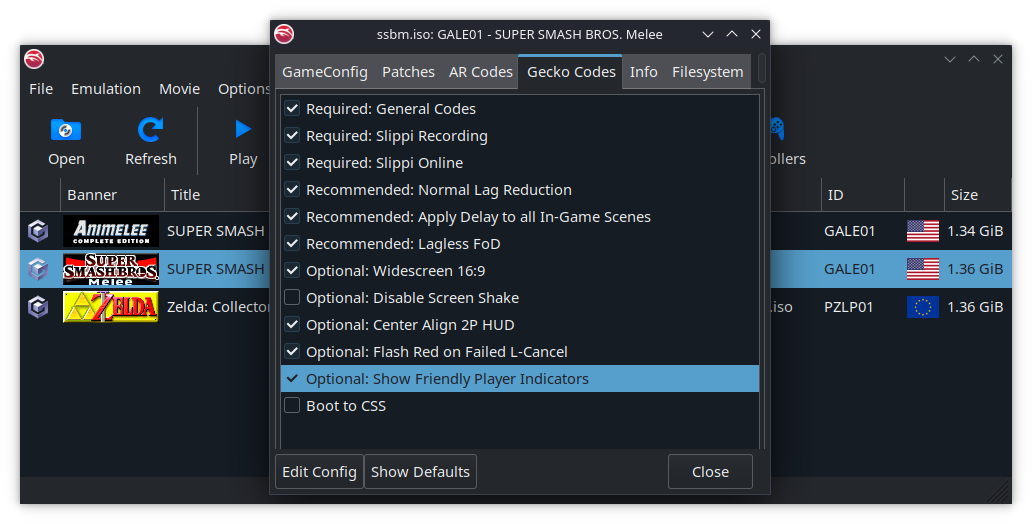
Click “Close” when done.
3. Play Slippi
Launch Melee from Dolphin. Go to Training Mode. Run around for a bit on a random stage. Keep a close eye on the framerate on the top-left. Make sure it stays at a consistent 60 FPS. If you want to play doubles, add a couple of CPUs from the Training Mode menu, and continue to monitor the framerate to ensure it stays at a smooth 60 FPS. If the game has consistent framerate dips, consider lowering the internal resolution.
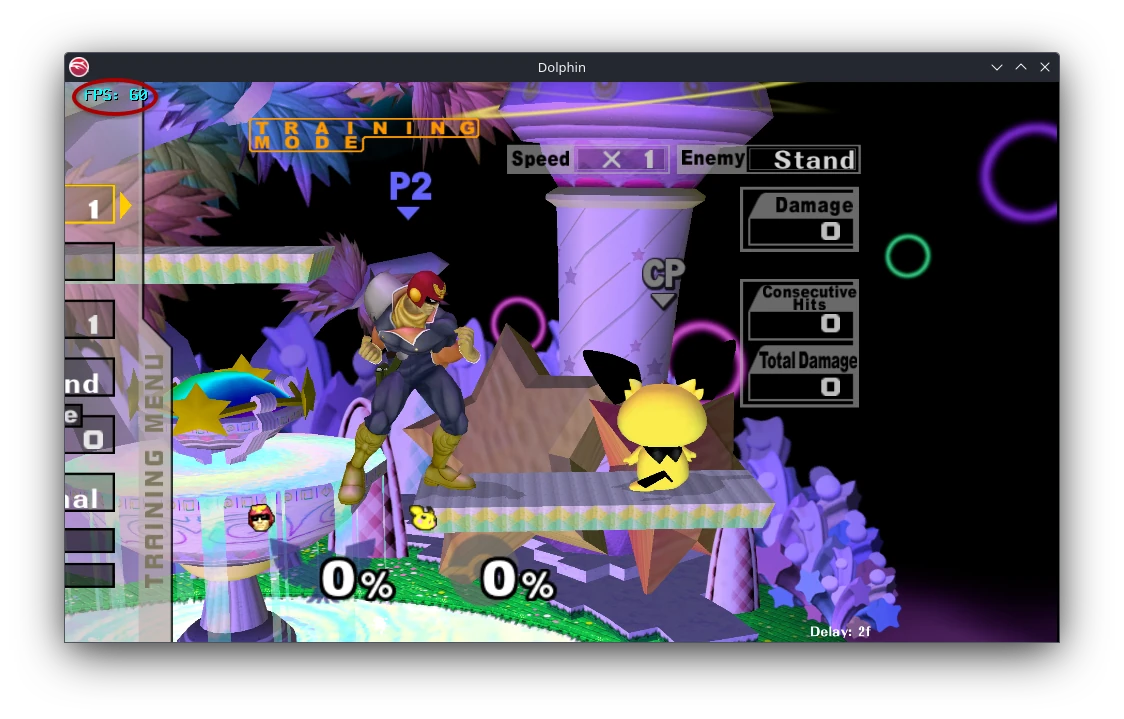
If all is well, you can start playing online. Select “Online Play” from the “1-P Mode” menu to get started. Next, I will go over the game modes you can choose from.
Unranked
As the name implies, there is no ranking in Unranked. This is a one-on-one mode. Select a character and press Start to find an opponent. You’ll usually find an opponent in just a few seconds. A random legal stage will be selected. Four stocks, eight minutes. No items. Rounds will keep going until you hold the Z button from the character selection screen (CSS), which will disconnect you from your opponent.
Observe your opponent’s ping from the top-left. You generally want to see this number at 50 or less. If it’s higher, there may be some lag during gameplay. If this happens, find a different opponent that’s closer to you.
Direct
This is one-on-one where you play against a specific opponent. You will provide your connect code to your opponent, and they will provide you with theirs. After selecting a character, press Start and you will be presented with an on-screen keyboard. Input your opponent’s connect code here, then select “CONFIRM” to start searching.
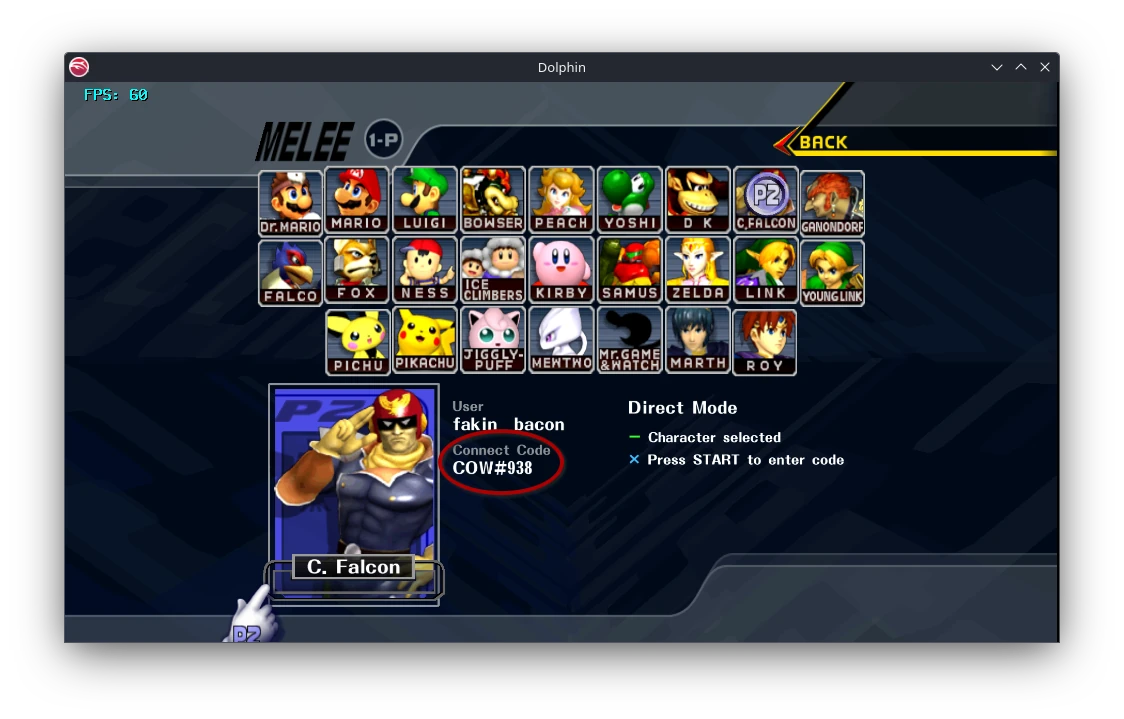
As an example, my connect code is COW#938. My opponent would search my code, and I would search theirs.
Teams
In Teams, you will be paired with a partner and play doubles. If you want to play against specific players, you’ll need to search the same code. For instance, four players will need to search DECK at the same time if they want to play together. Note that you don’t have to use the code DECK; it can be literally any name that you can come up with. Make sure you communicate with your partner ahead of time what team color you will be. By default, the color is red, but this can be changed to blue or green by selecting the color name from the character portrait and pressing A. If you would rather have a random partner each round as opposed to having a static teammate, make sure all four players have the same color selected. This will shuffle the player colors and who’s in each team every round.
If you happen to live somewhere in the eastern coast in the United States, you can actually just search EC and you might happen to find three other players who are also searching the same code within a few minutes. If you want to play with a static partner, both of you will need to search EC@ followed by a number (like EC@29, for example).
Join the Melee Online Discord and go to the #doubles channel if you want to find people to play with you. In my experience, it’s much easier to find a doubles match at night as opposed to the day.
An important note while playing doubles, is that each player should generally be within the same region as you. If you have two people living in the east coast and two on the west coast, for example, the ping can be quite high, depending on the distance, and this can result in a laggy gameplay experience.
Ranked
Ranked Mode, without a subscription, is only available once every four days. With an active sub, however, users can play Ranked at any time. At the time of writing this, the minimum cost for joining Ranked is $5/month.
Ranked is a little different than Unranked. It’s one-on-one, but you’ll fight your opponent in a best-of-three, and you’ll be presented with a legal stage list that you can choose from. Once a stage has been played, it will be crossed out, and you’ll have to select a different stage in the next round.
You can view your ranking by clicking your profile icon in the top-right on the Slippi website and selecting “View profile”.

Tips and Tricks
Use Ethernet
Please do NOT play Slippi via Wi-Fi! Playing without an Ethernet connection can cause intermittent connectivity issues between you and your oppponent.
Overclocking the GCC Adapter
If you’re using a GameCube controller, I highly recommend overclocking the adapter for a more responsive input to your controls.
Animelee
Animelee is a great way of making Melee look more modern with cel-shaded characters and stages. There’s also a Dragon Ball Z edition! I (should) have a patching guide up soon if you want to get your ISO patched. Animelee is Slippi-compatible!
Diet Melee
Diet Melee is great for not only trimming up the ISO file size for Melee, but also reducing the poly count so as not to be so demanding of your Deck’s hardware. There’s three versions you can choose from:
- Diet Melee Classic
- Crystal Melee
- Diet Melee 64
I recommend using Diet Melee 64 for getting those nostalgic Nintendo 64 vibes from Smash 64, then setting the internal resolution to 1x to make the game look more pixel-y.
Keep in mind, however, that because Diet Melee takes a lot of content away, the game will freeze if a non-legal stage is chosen.
Launch Slippi Immediately from Steam
In Dolphin, from the Configuration window, check “Start Default ISO on Launch”. Next, with your file browser, navigate to ~/.config/Slippi Launcher/netplay/. There should be a Slippi_Online-x86_64.AppImage file. Right-click it, select “Add to Steam”. Now, when you’re in Game Mode, you can immediately play Slippi without having to see the Slippi Launcher or Dolphin.
From here, you can optionally add artwork to Slippi with the SteamGridDB plugin. Install Decky Loader from Desktop Mode, and when you get back to Game Mode, you should be able to install the plugin from the plugin store.
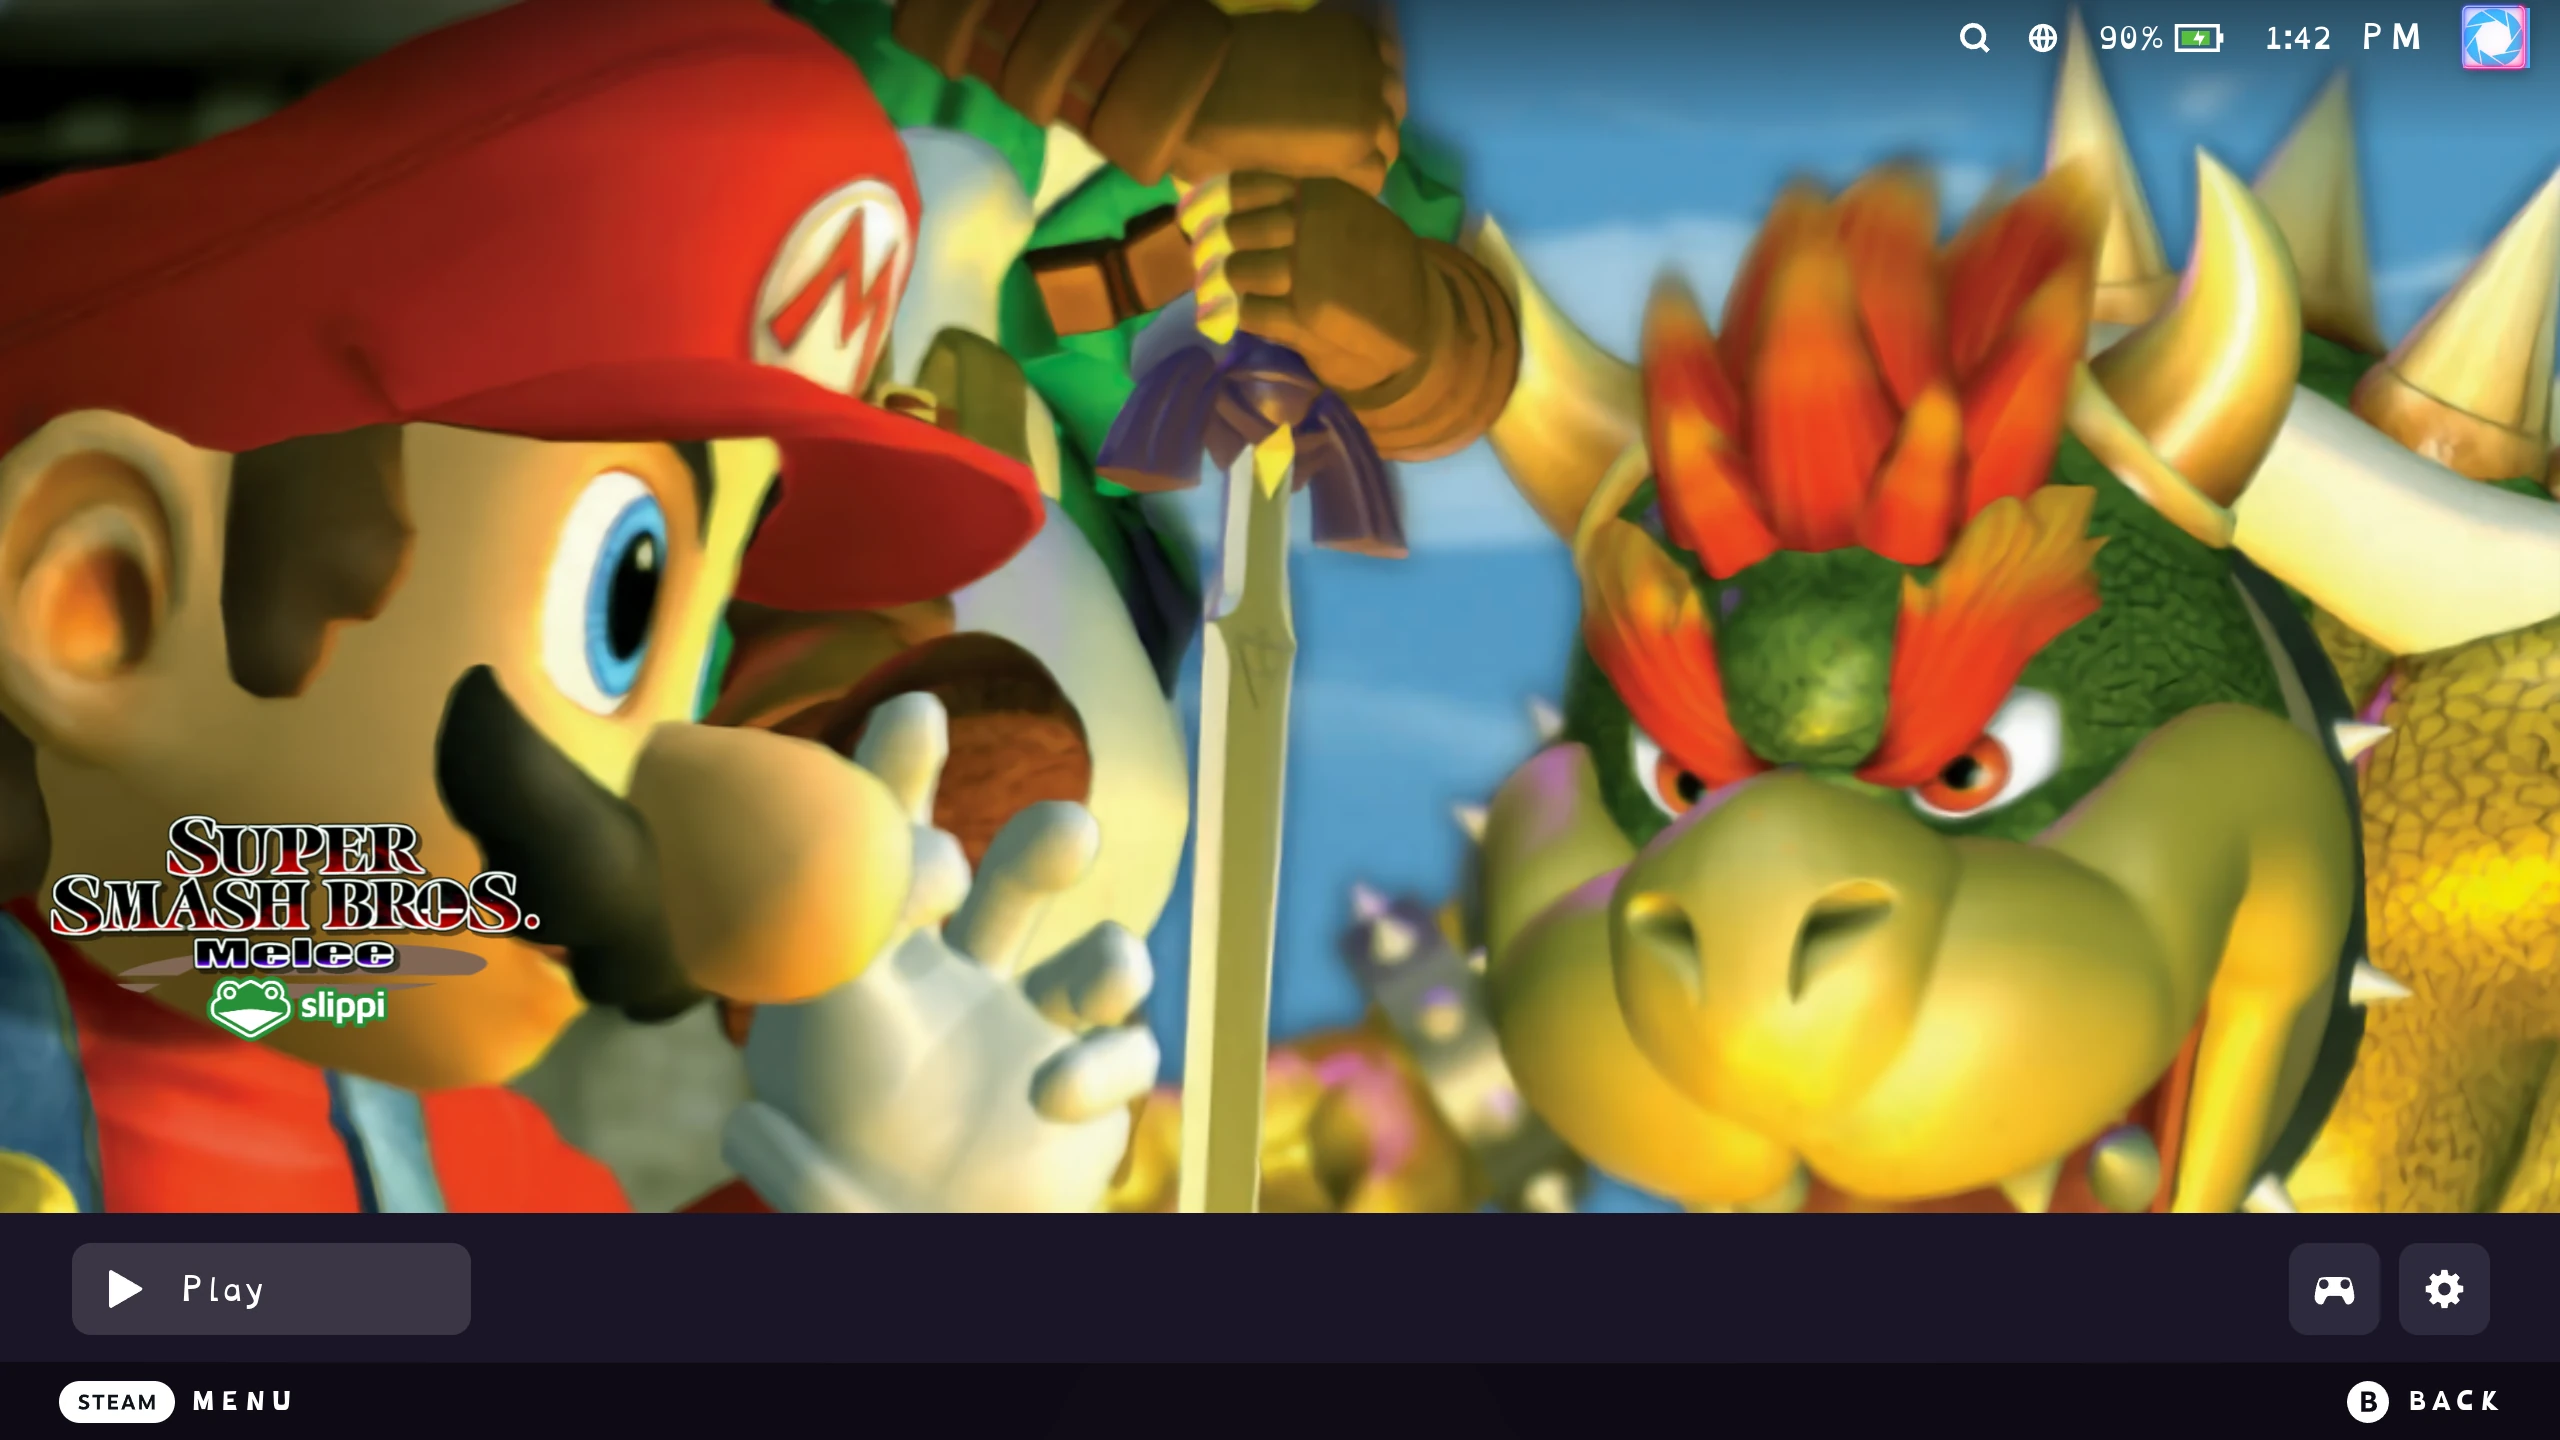
Note that you may need to re-configure your controls and set the device to “Microsoft X-Box 360 pad 0” if you’re using the Deck’s built-in controls, since Game Mode uses a different controller profile.
Need Help?
Join my Discord and I’ll see if I can help you out.
