How to Overclock Your GameCube Controller Adapter on Steam Deck

If you happen to be a Smash Bros. fan like myself, you probably have a GameCube controller that you use to play it with. One disadvantage, however, with using either the Mayflash GameCube controller adapter or the official adapter by Nintendo, is that by default, the adapter polls at a rate of 125 Hz, or every eight milliseconds. Ideally, we want to increase the poll rate to 1,000 Hz, that is, every millisecond. Because for a fast-paced game like Melee or Project M/Project+, we want our controller to be super-responsive to every single flick of the stick or button that we press, and if the controller is only polling every eight milliseconds, you might just miss flicking the C-Stick to the left for that Falcon knee that the controller would have otherwise picked up if it had less input lag.
And for a long time, no one had been able to figure out how to overclock the GCC adapter on the Steam Deck. Users were stuck with the default 125 Hz polling rate and were forced to use other Linux distros or Windows if they wanted to overclock their adapter.
Thankfully, there’s a fix for that. I finally managed to work my way around SteamOS’ quirky way of dealing with Arch packages, and as a result, overclocking the GCC adapter on Steam Deck is possible with just a few commands from the terminal. But it gets even better; I wrote a simple bash script that puts all of the commands needed to install the necessary packages together, meaning you can overclock with just a few clicks. You don’t even need to plug in a keyboard or mouse. And it doesn’t matter whether you have the original LCD model or the OLED edition of the Deck.
So let’s get started!
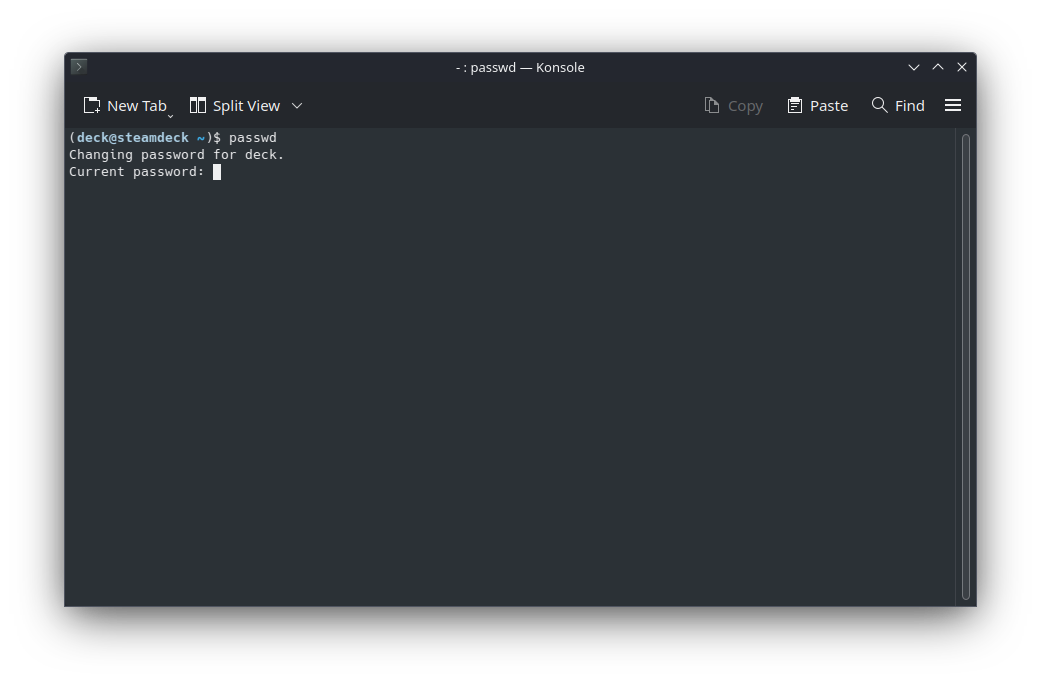
1. Have a Root Password Set Up
With your Steam Deck, go to Desktop Mode. Before running the script, please make sure you have a root password set up. To do so, open up a terminal, type in passwd, and follow the instructions to set up a password. Note that you can do this with Steam’s on-screen keyboard; to bring this up, press the Steam button + X.
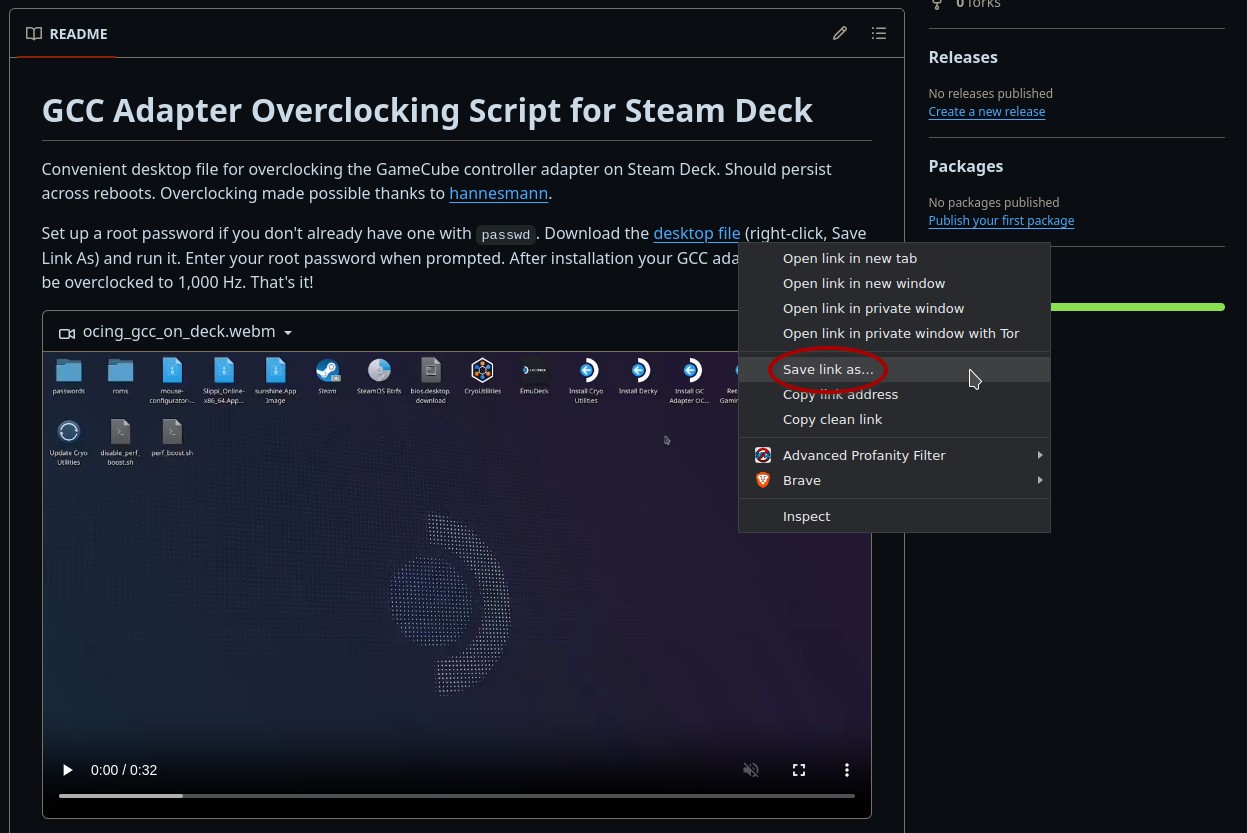
2. Download and Run the Script
Open up a web browser and go to my GitHub repo. You’ll see a hyperlink in the README that says “desktop file”. Right-click that link (you can just press the left trigger), and in the context menu, select “Save Link as…” Save the install.desktop file to your desktop. Note that, if the .desktop file doesn’t appear in your desktop, you may need to open up a file manager and navigate to the desktop to see it.
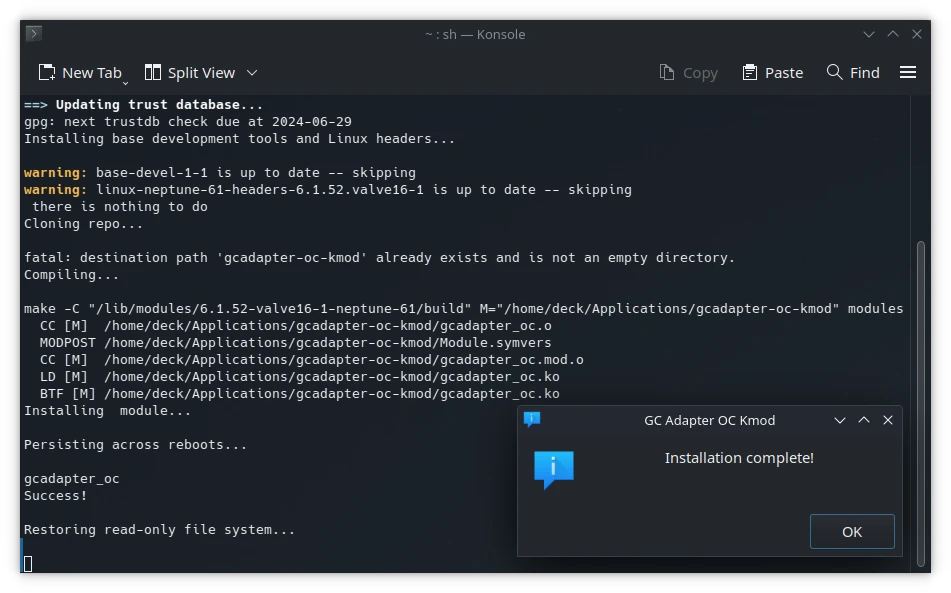
Double-click the file. You’ll probably be asked if you want to continue before running the script. Select “Continue” to, well, continue. A terminal window will appear, and then you’ll be asked to enter your root password to proceed with the installation of the overclock module. In the text field, enter your root password (again, you can bring up the OSK with Steam + X). Click “OK” to proceed with the installation.
Some text will scroll in the terminal window. This will inform you what the script is doing. It should take less than a minute to install. A message should appear when it’s done and tell you the installation finished.
That’s literally it! The script has a couple of commands to make sure the overclock stays persistent when the device is shut off or restarted, so there’s no need to run the script again unless you want to uninstall the overclock module.
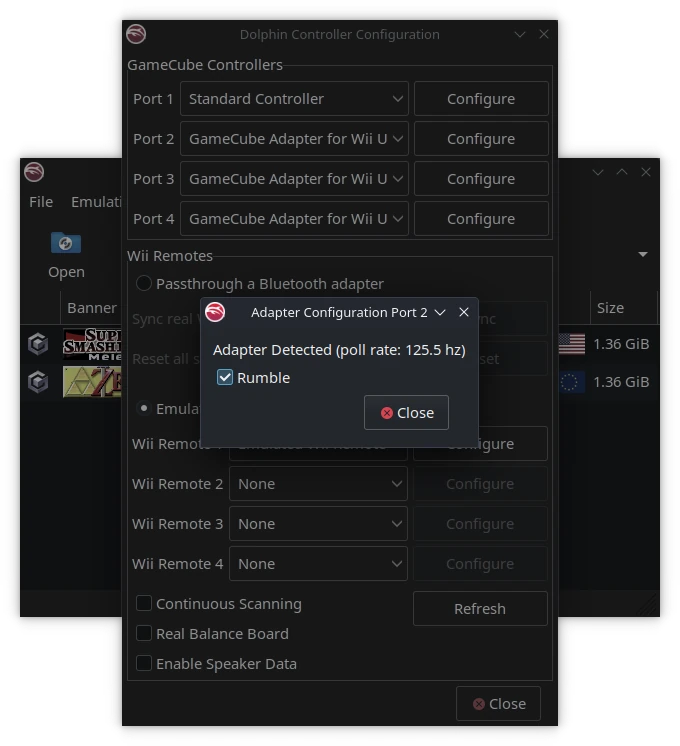
3. Verify Polling Rate
To verify the polling rate, open up Dolphin, Slippi, Project+, or whatever fork of Dolphin that you use, go to the Controller settings, and under the port that the controller is plugged into, select Configure. The new window should tell you the polling rate of the adapter.

If you come across any issues, feel free to open up a ticket on the issue tracker. The script is also open-source, so if you find any ways to simplify the script or add in new features, pull requests are always welcome.
